Corner to Corner Tutorial – Part 1
I am often inspired by so many of your masterpieces and have a long wishlist of wanting to do them but appreciate the hours going into them I might not have.
There was a lovely lady who popped into the shop one day, (if your reading this you will know who you are ;)) who inspired me with some of her crochet work, and she said something that suits me down to the ground, “It’s sooo Fast”. Yipee. She gave me a quick run through how to do it and I practised it on making up these dishcloths using our Rico Aran.

I was looking for a good reason to carry it out on a larger project and didn’t have long to wait when I heard last week a friend had a wee baby boy.
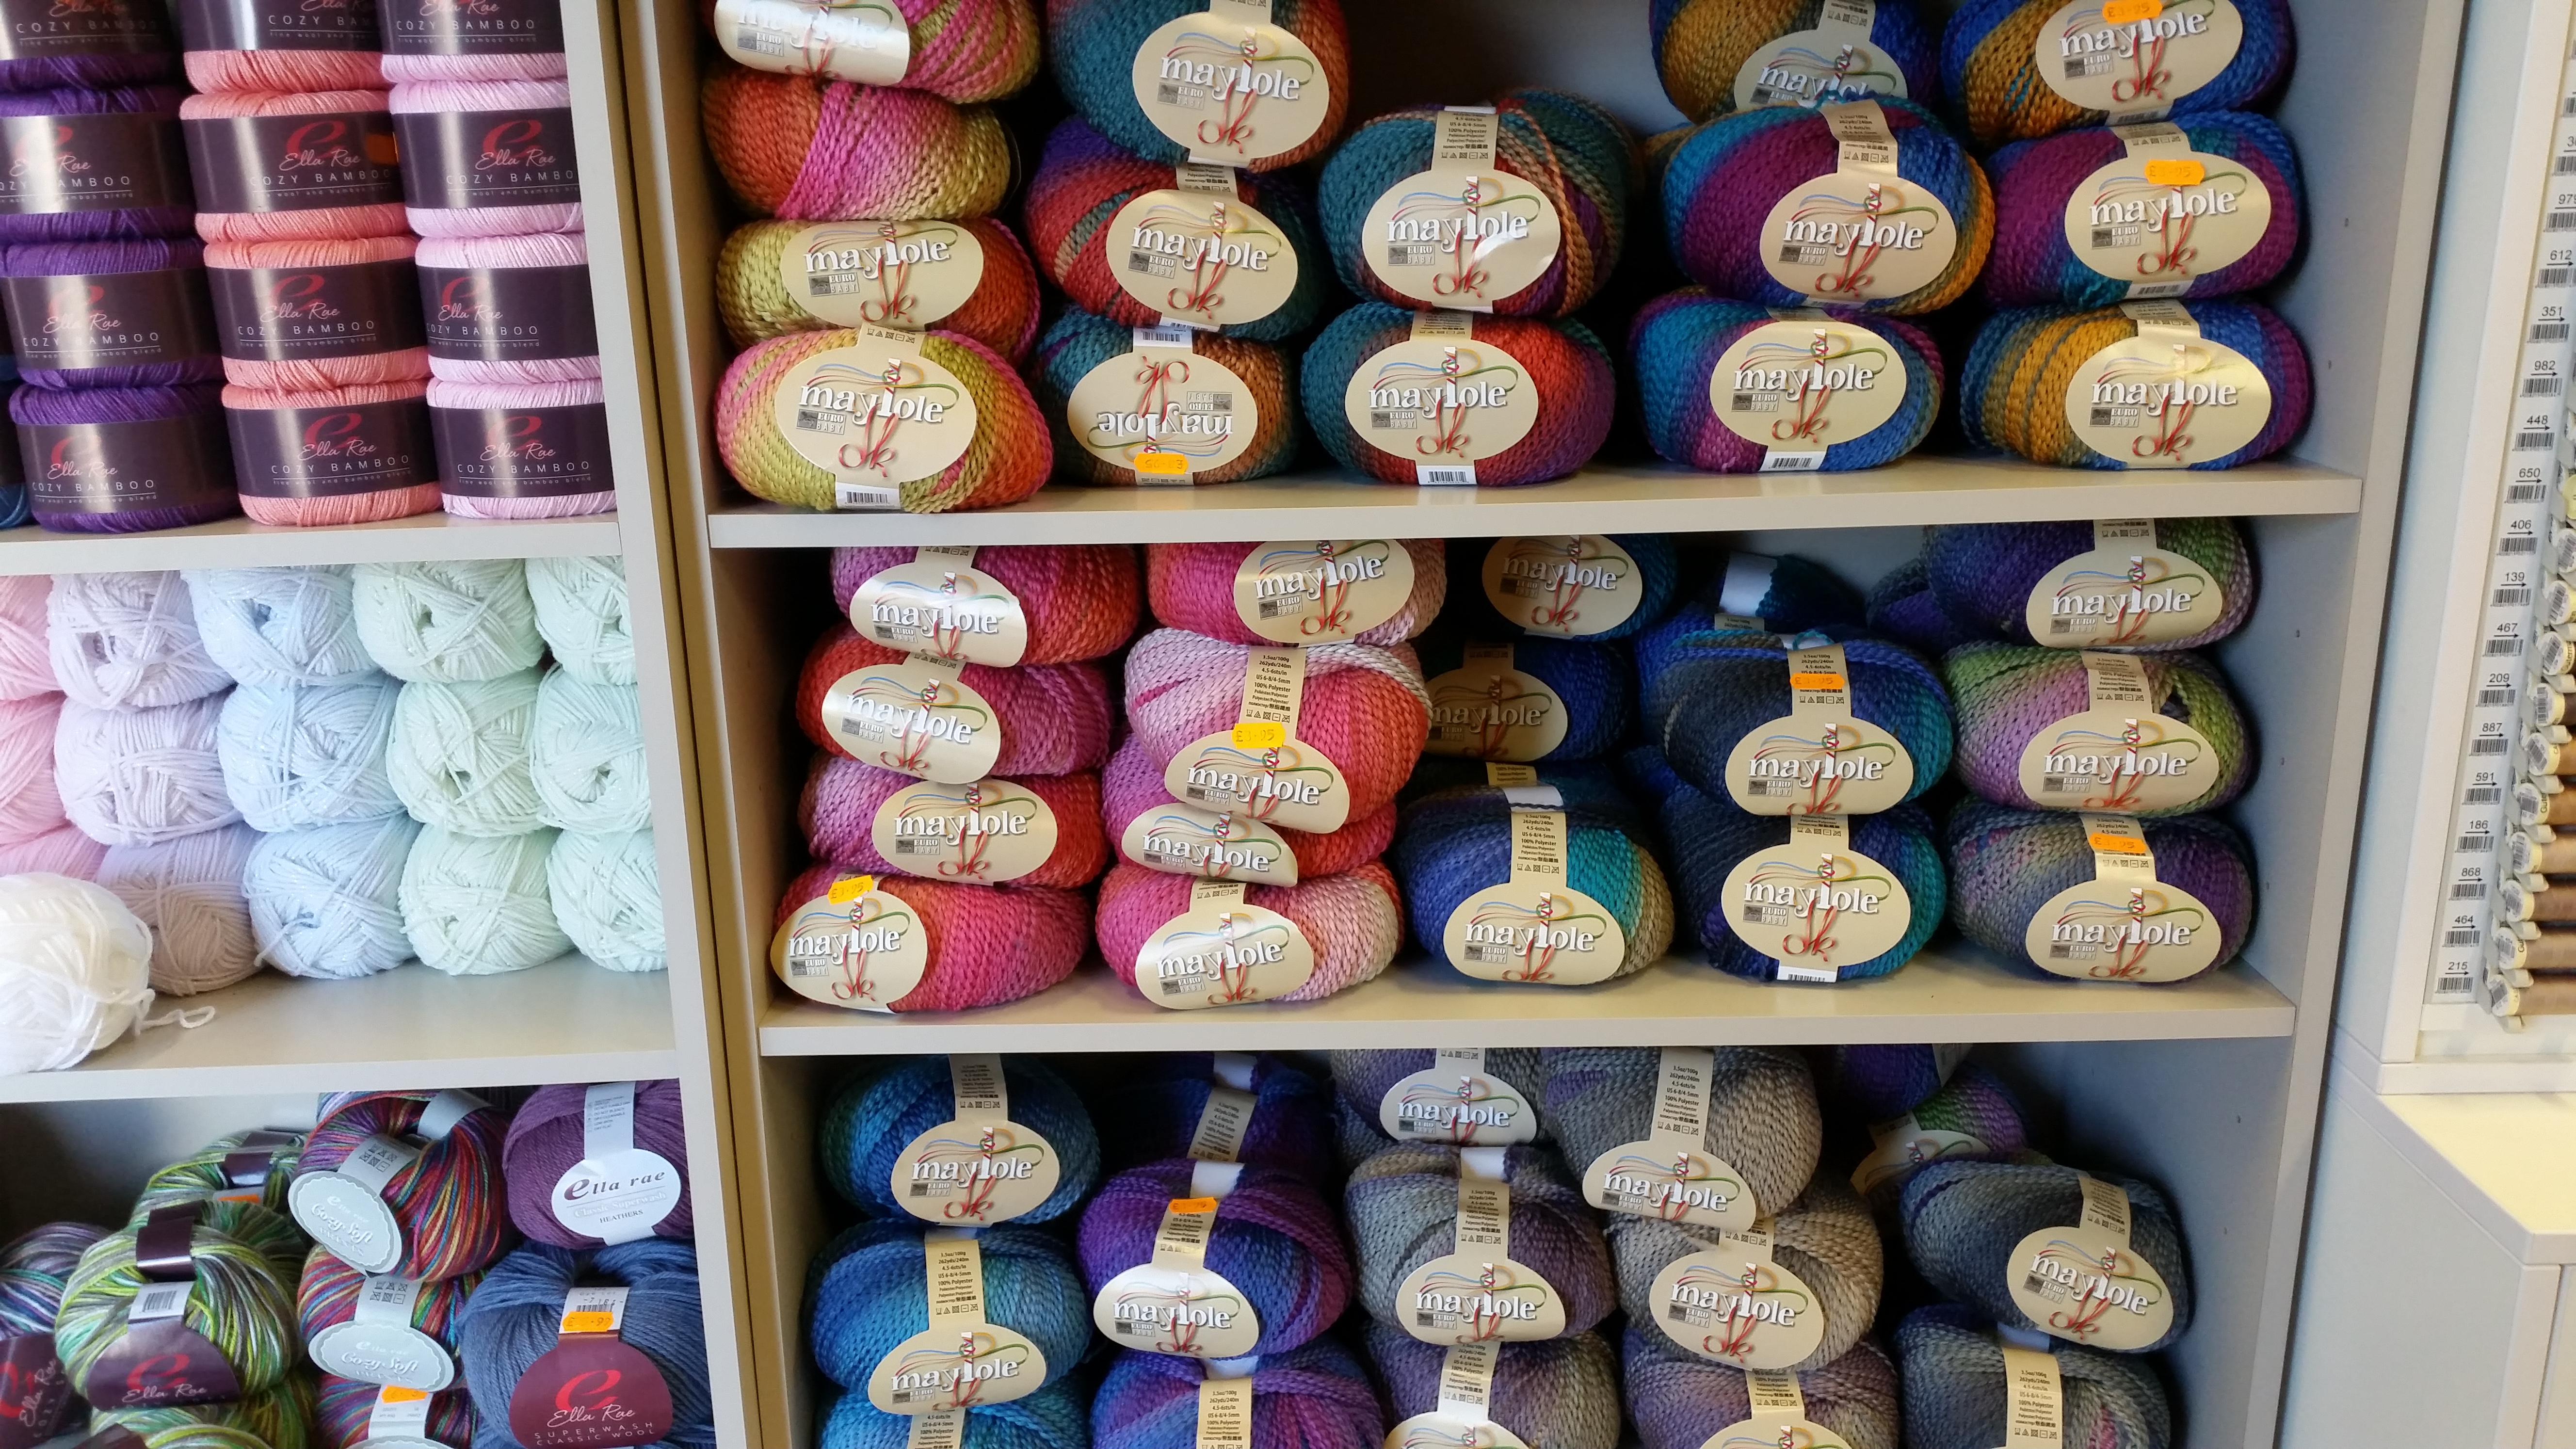
So a blanket was the cards next. If some of you have been by the shop you will have seen we had a delivery of some new yarns last week. One of them being Maypole dk. This yarn is a 100g ball and is 100% Polyester. The sheen and colours of it is gorgeous, so off course I had to try it out 😉
The pattern is called Corner to corner. I know a few of you have seen the dishcloths etc and was looking a wee pattern hence I decided to put it in a post for you.
A few of the advantages of Corner to Corner is * it grows really fast * it works great with colour change * its great for using up scrap yarns.
Here is a tutorial for you:
To do this blanket I am working with a 4mm hook.
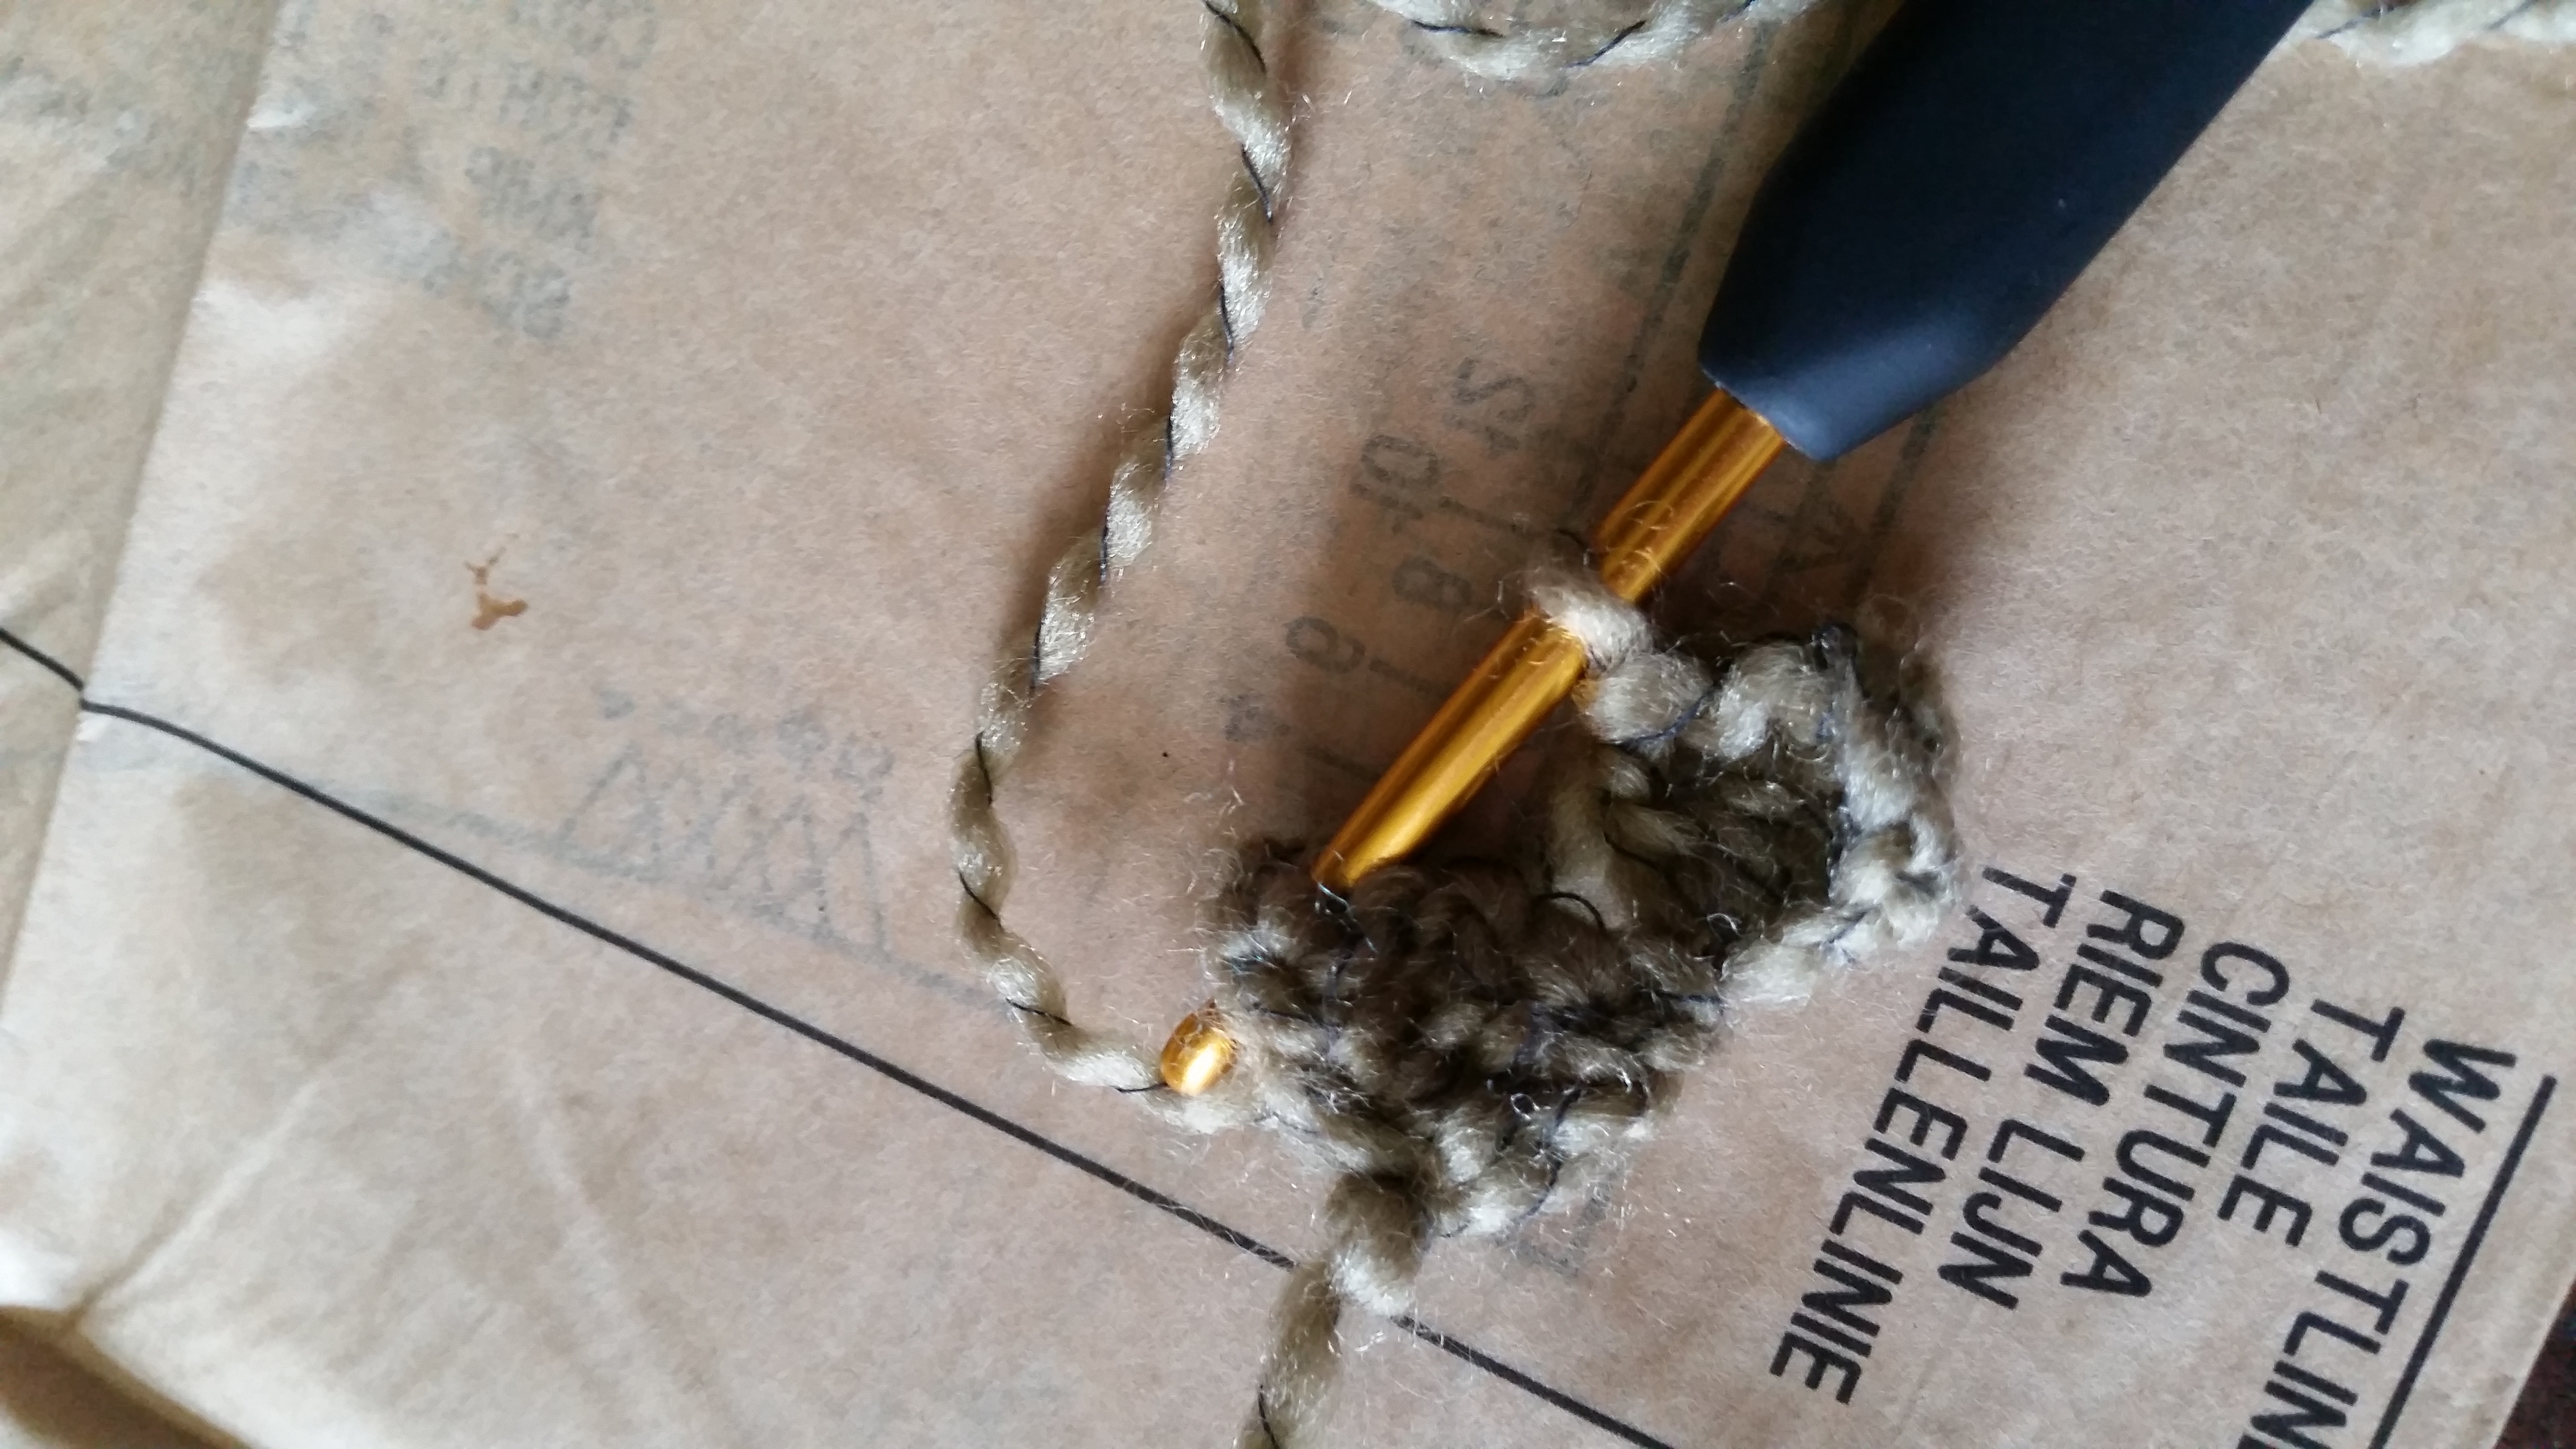
– Put slip knot on hook
– Chain 6
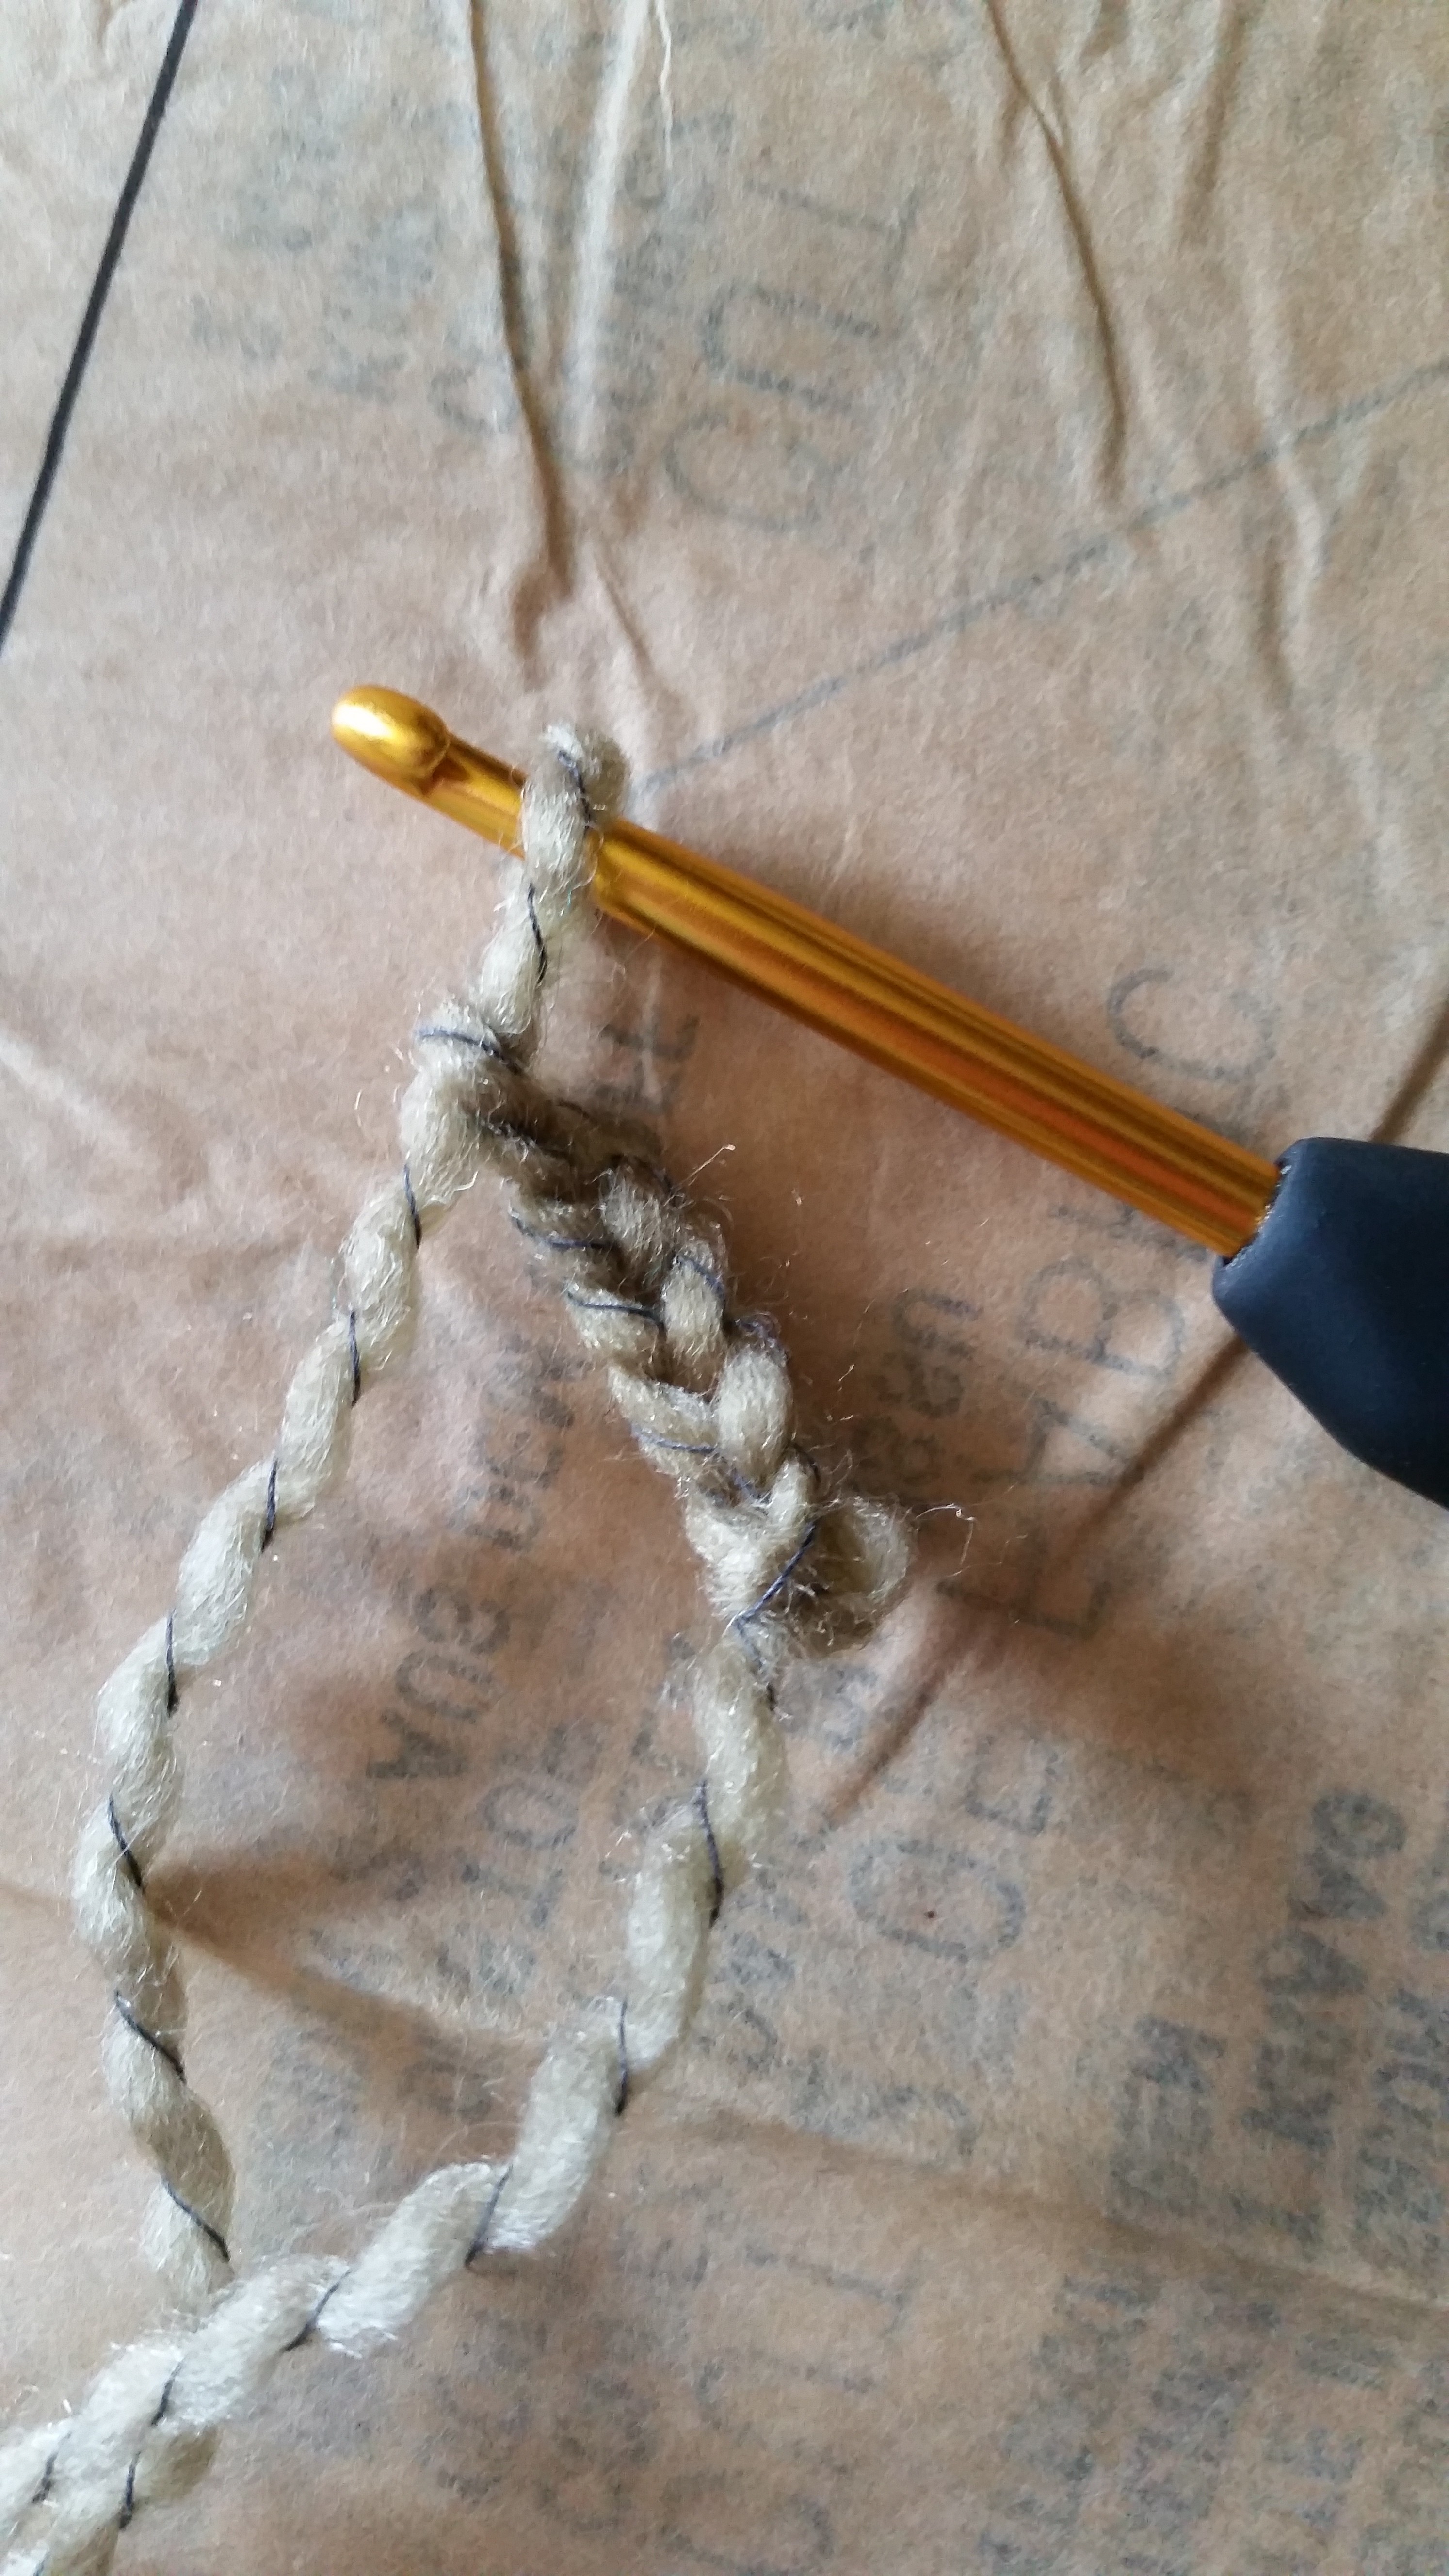
– Work into 4th chain from hook and dc
– Work a dc in remaining 2 chains
– This will be your first block
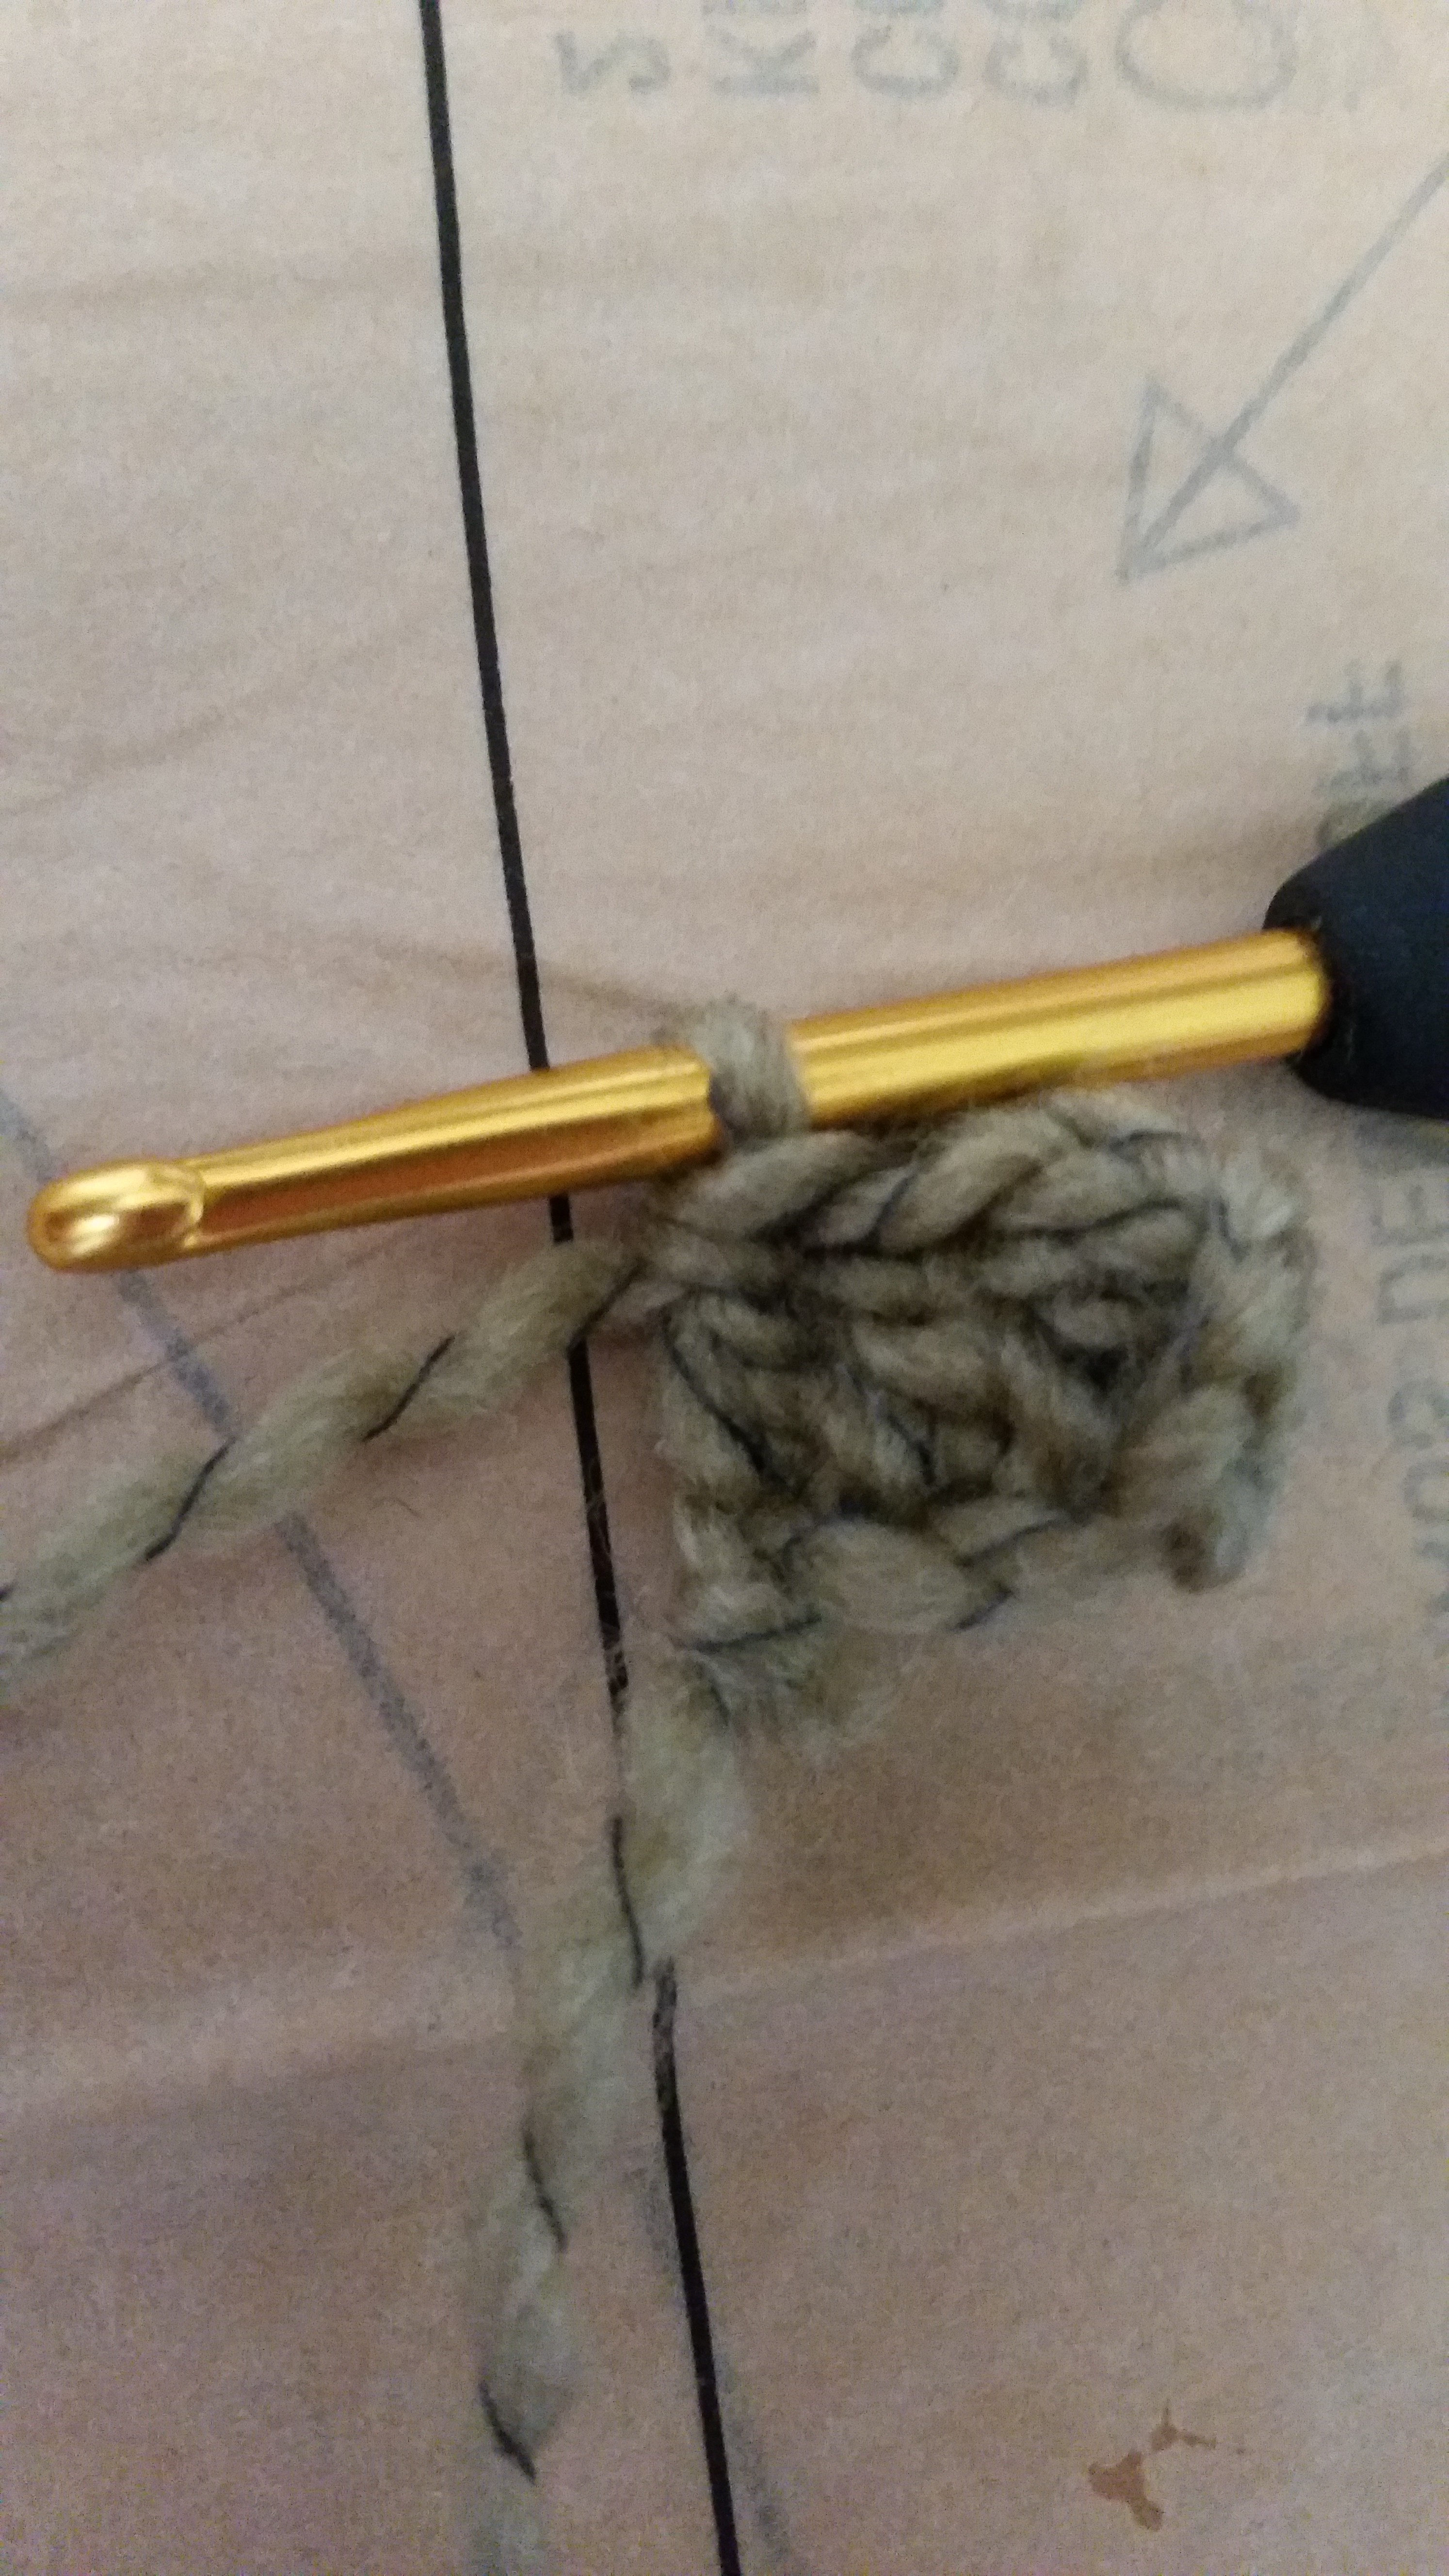
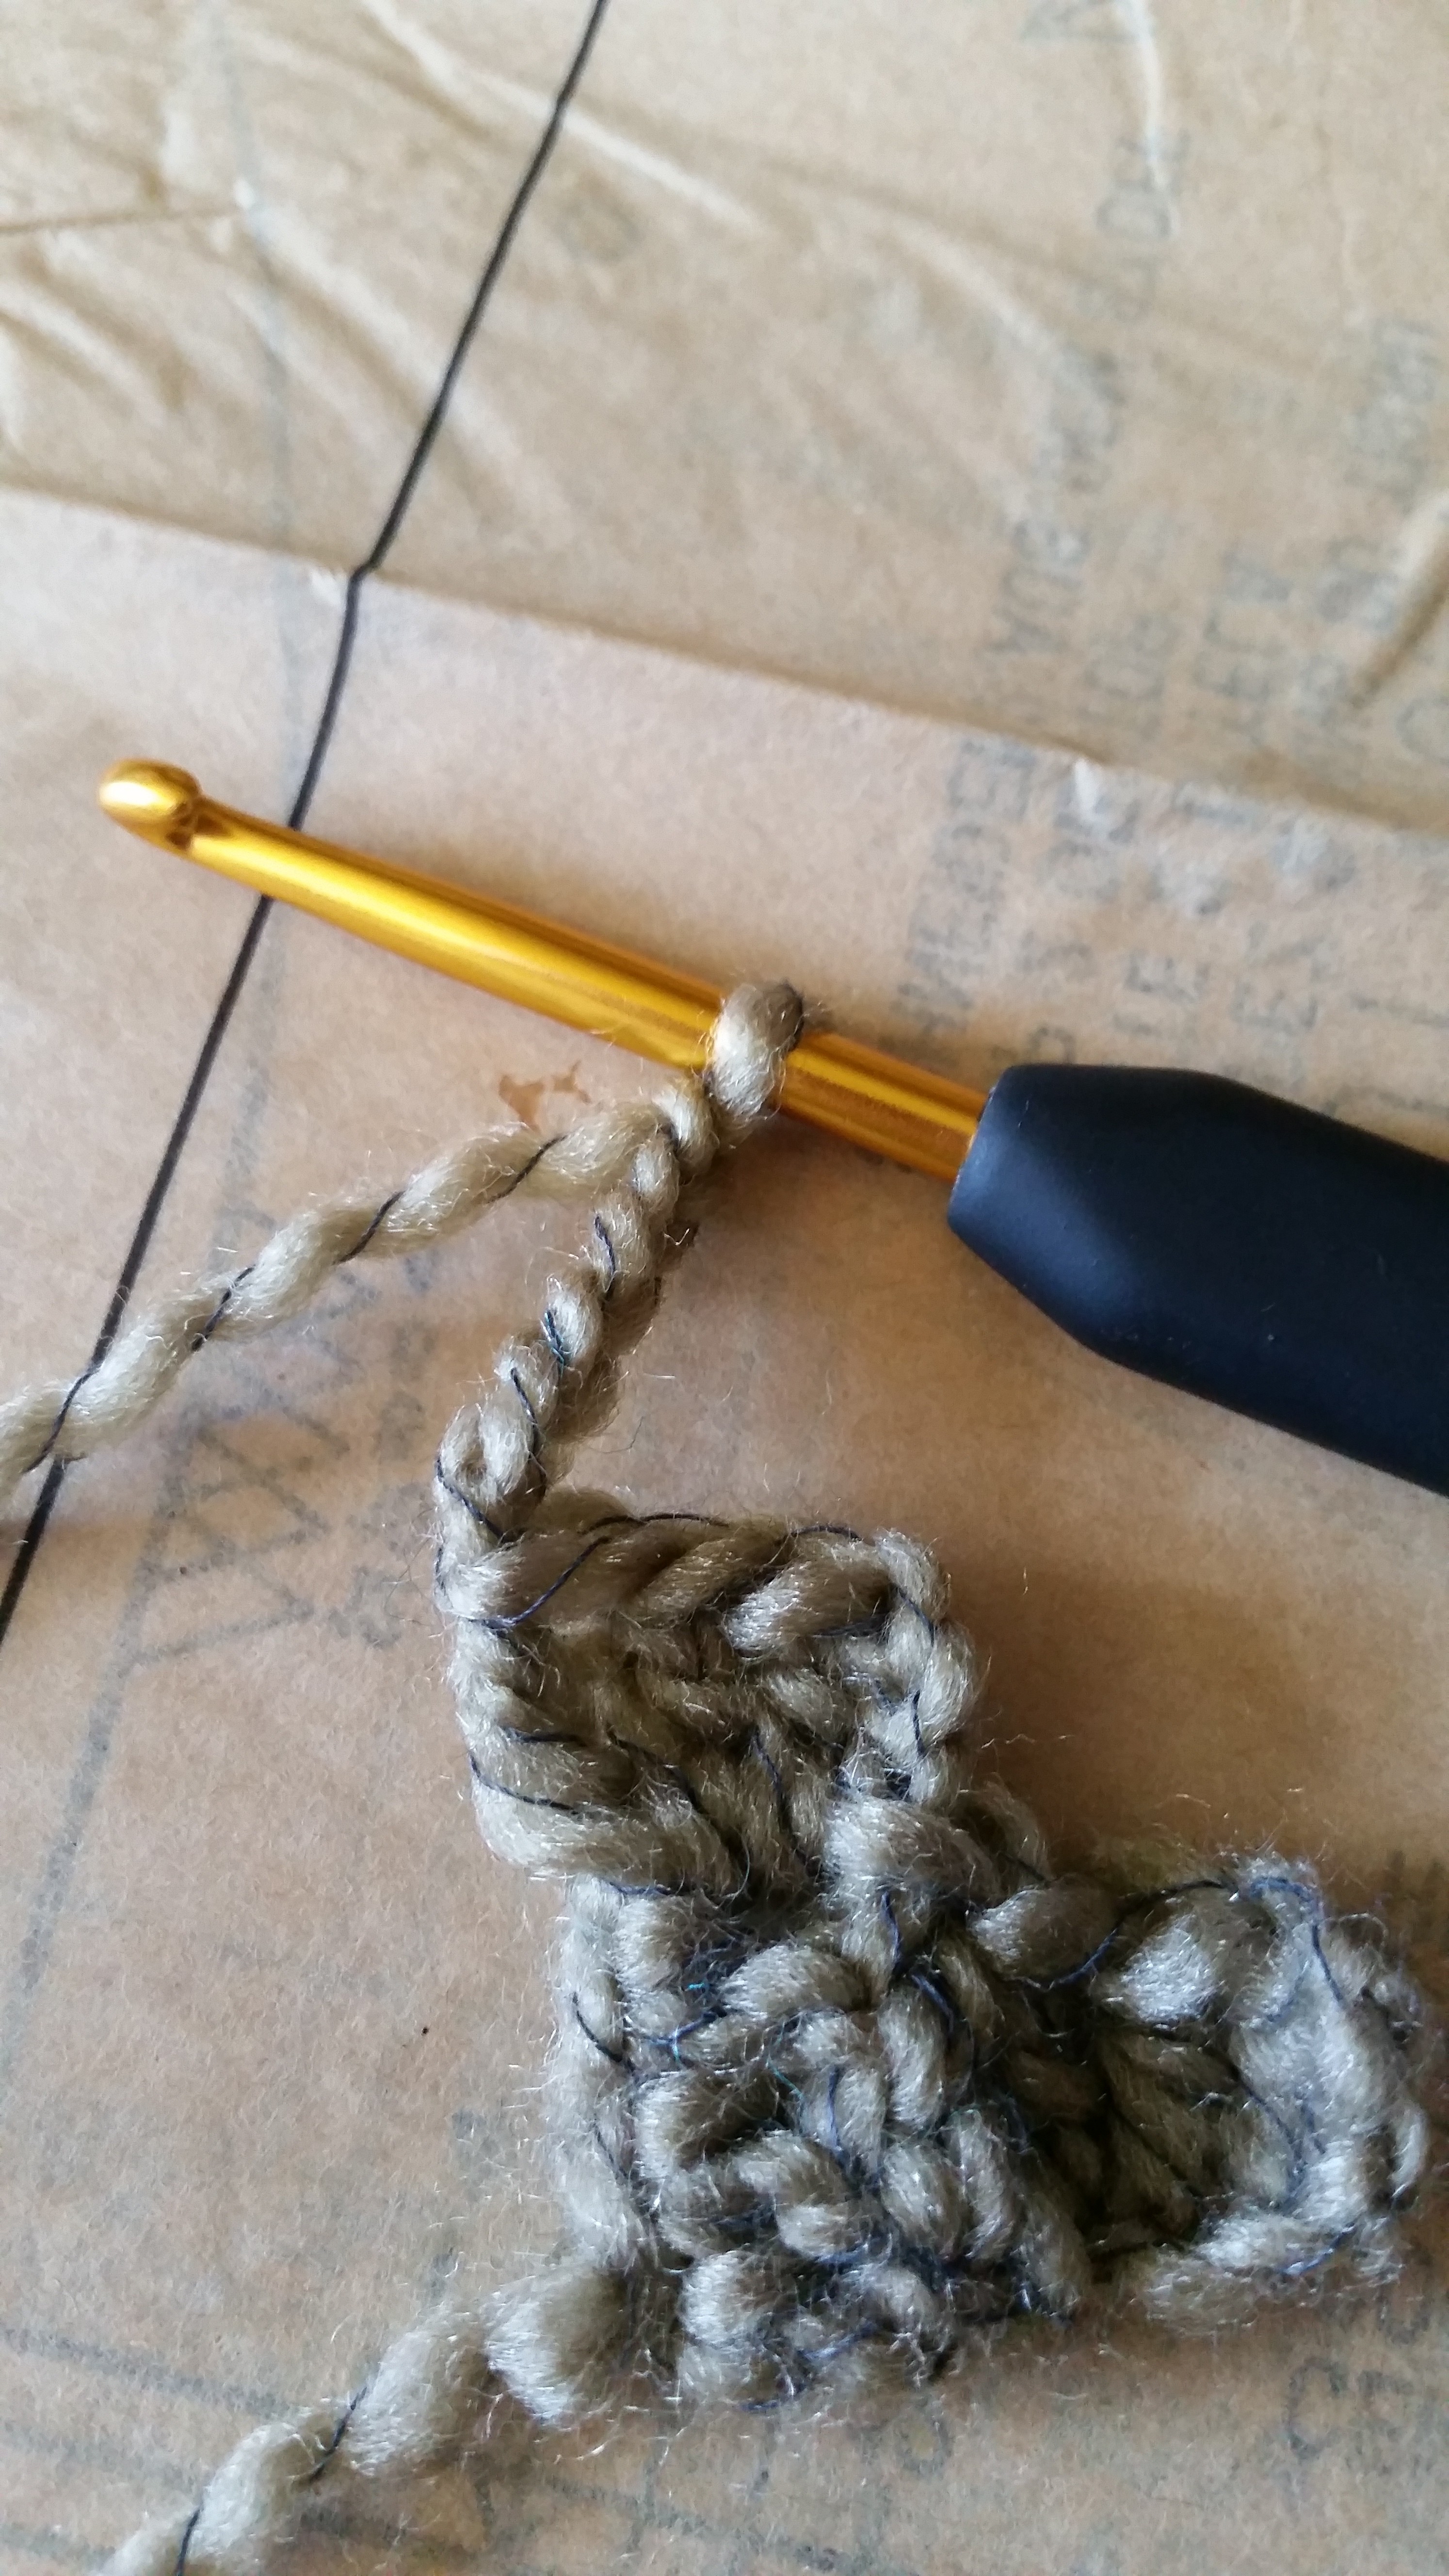
– Turn your work and then chain 6
– Work in 4th chain from hook and dc
– dc crochet in 5th and 6th chain. Now you have 2 blocks
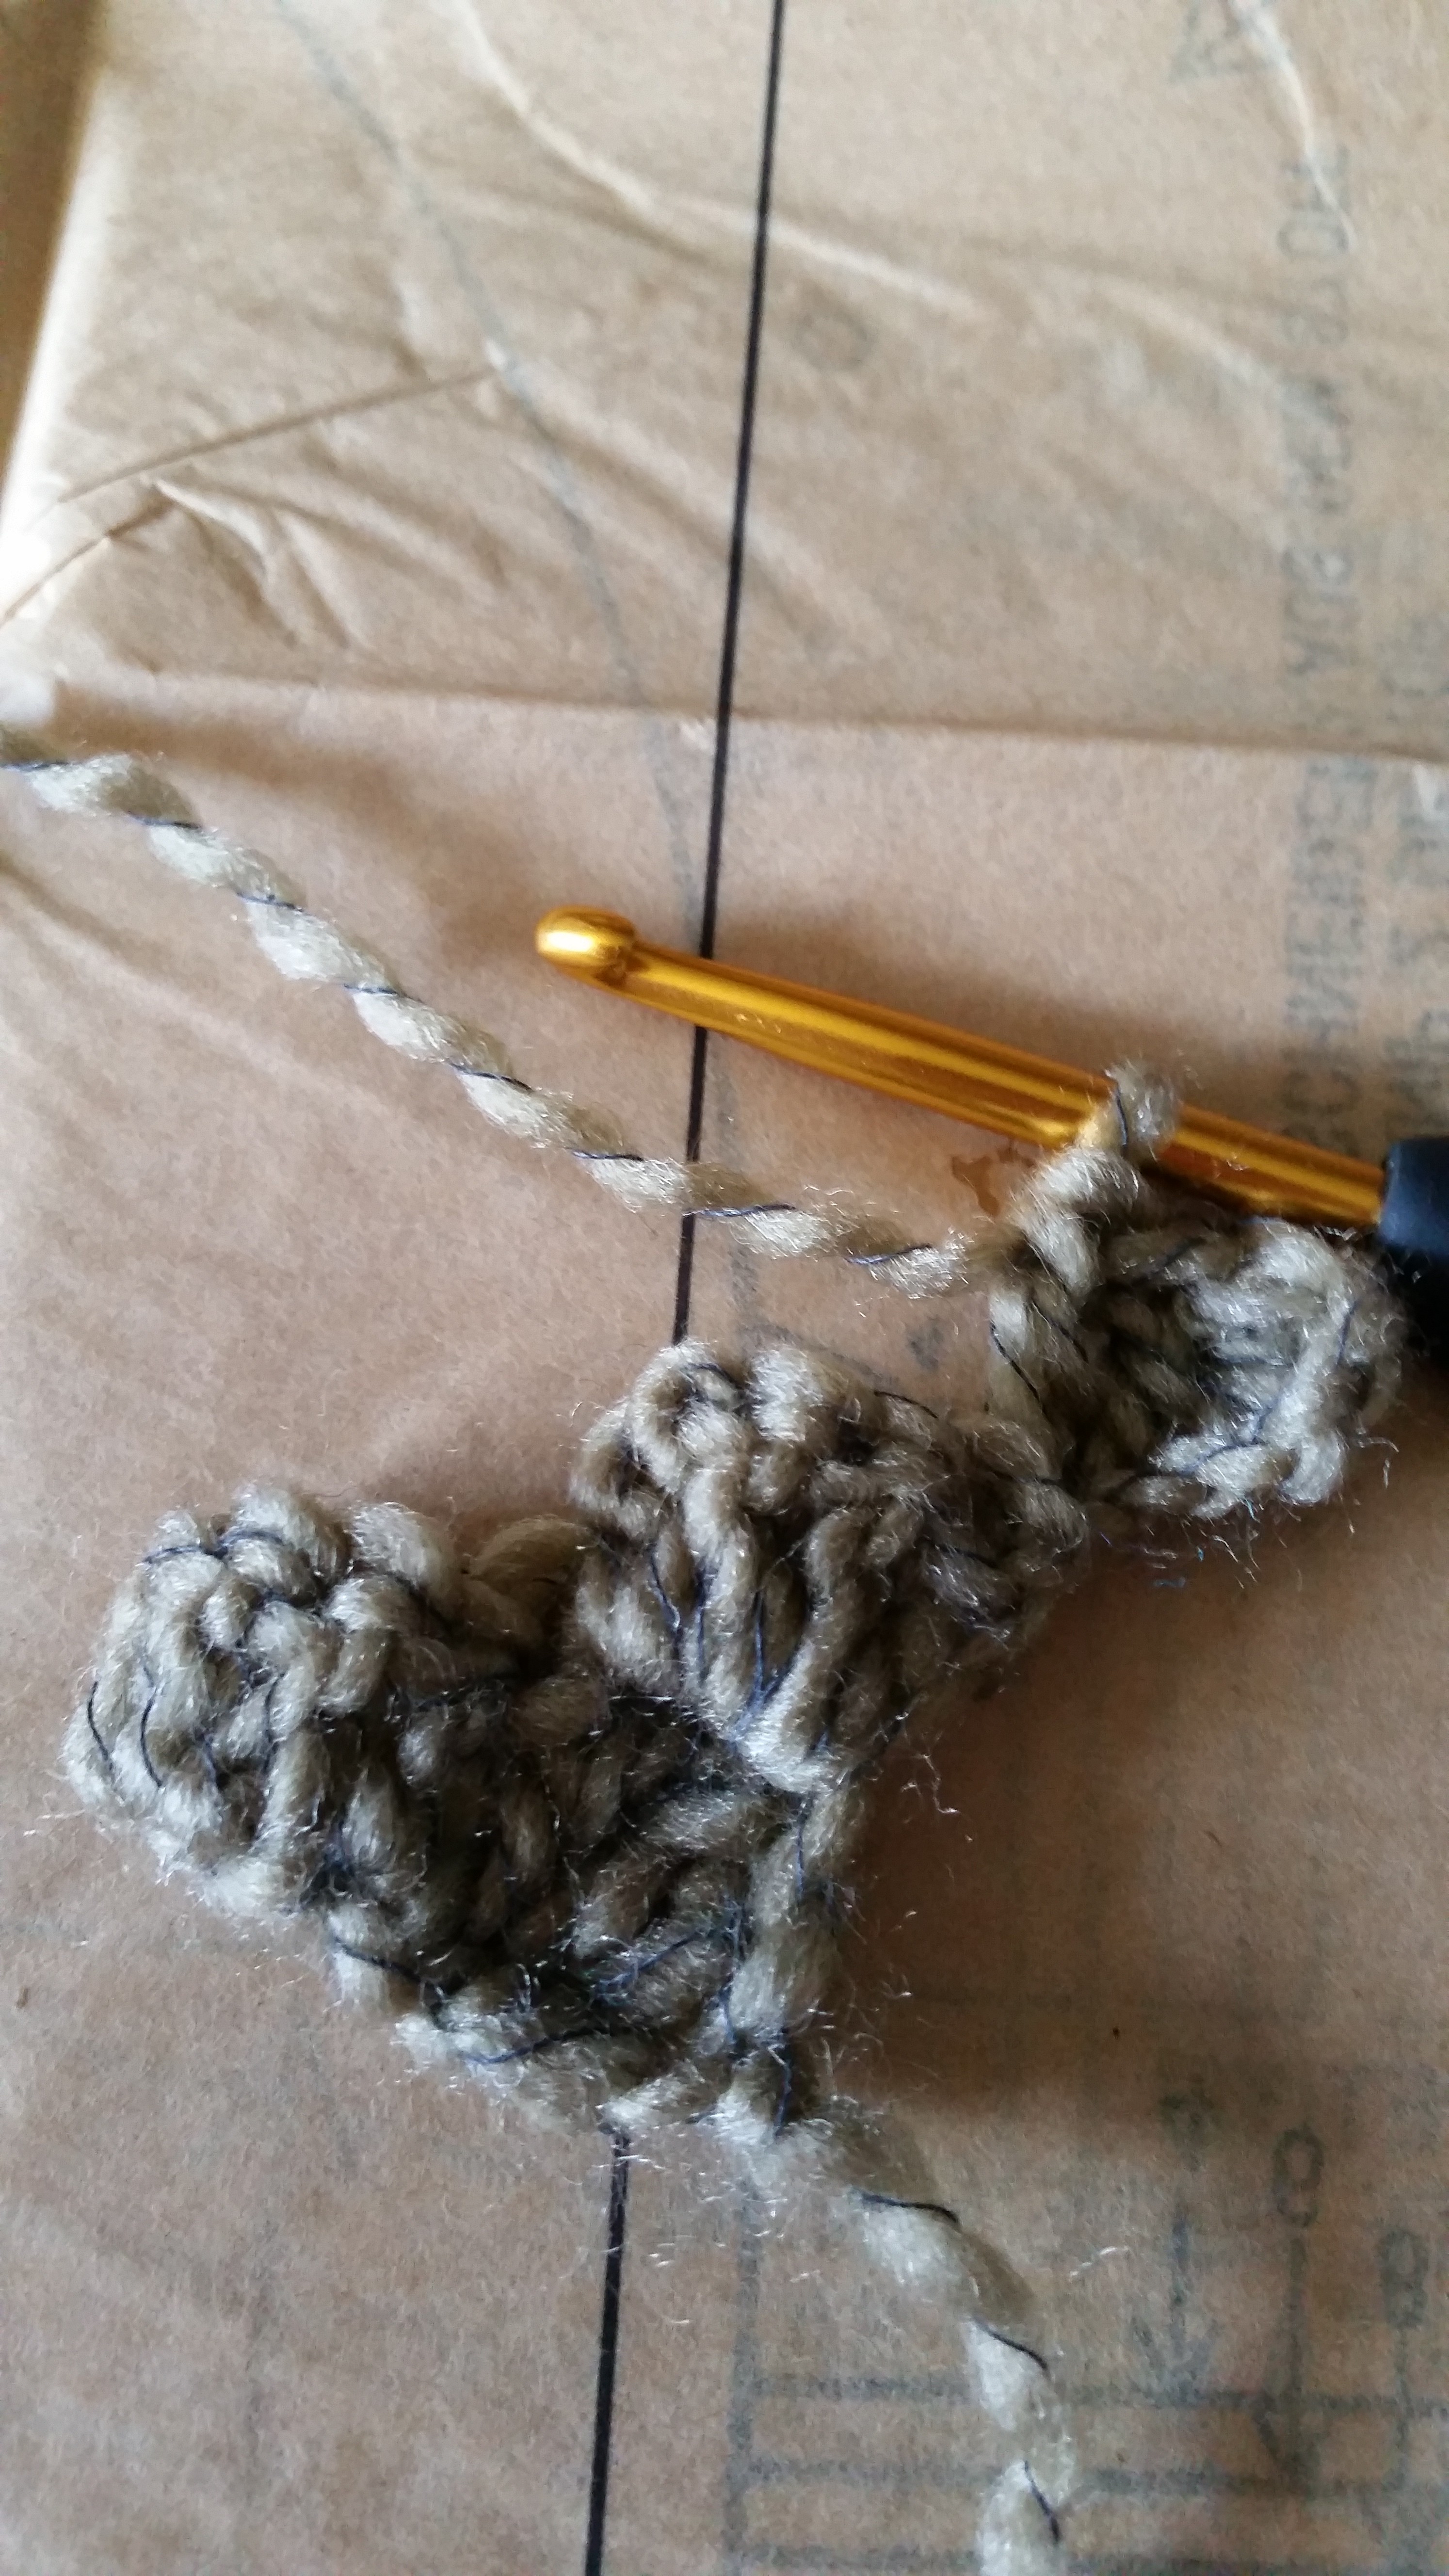
– Now jump over and insert your hook into the space of the first block and slip stitch. (I hope you can see where I mean here. After the 3 dc in the block, there will be a wee space. Your block will be a d shape – the space will be at the curve part of the d)
– Chain 3 then work three dc into same space (the space at the curve of the d)

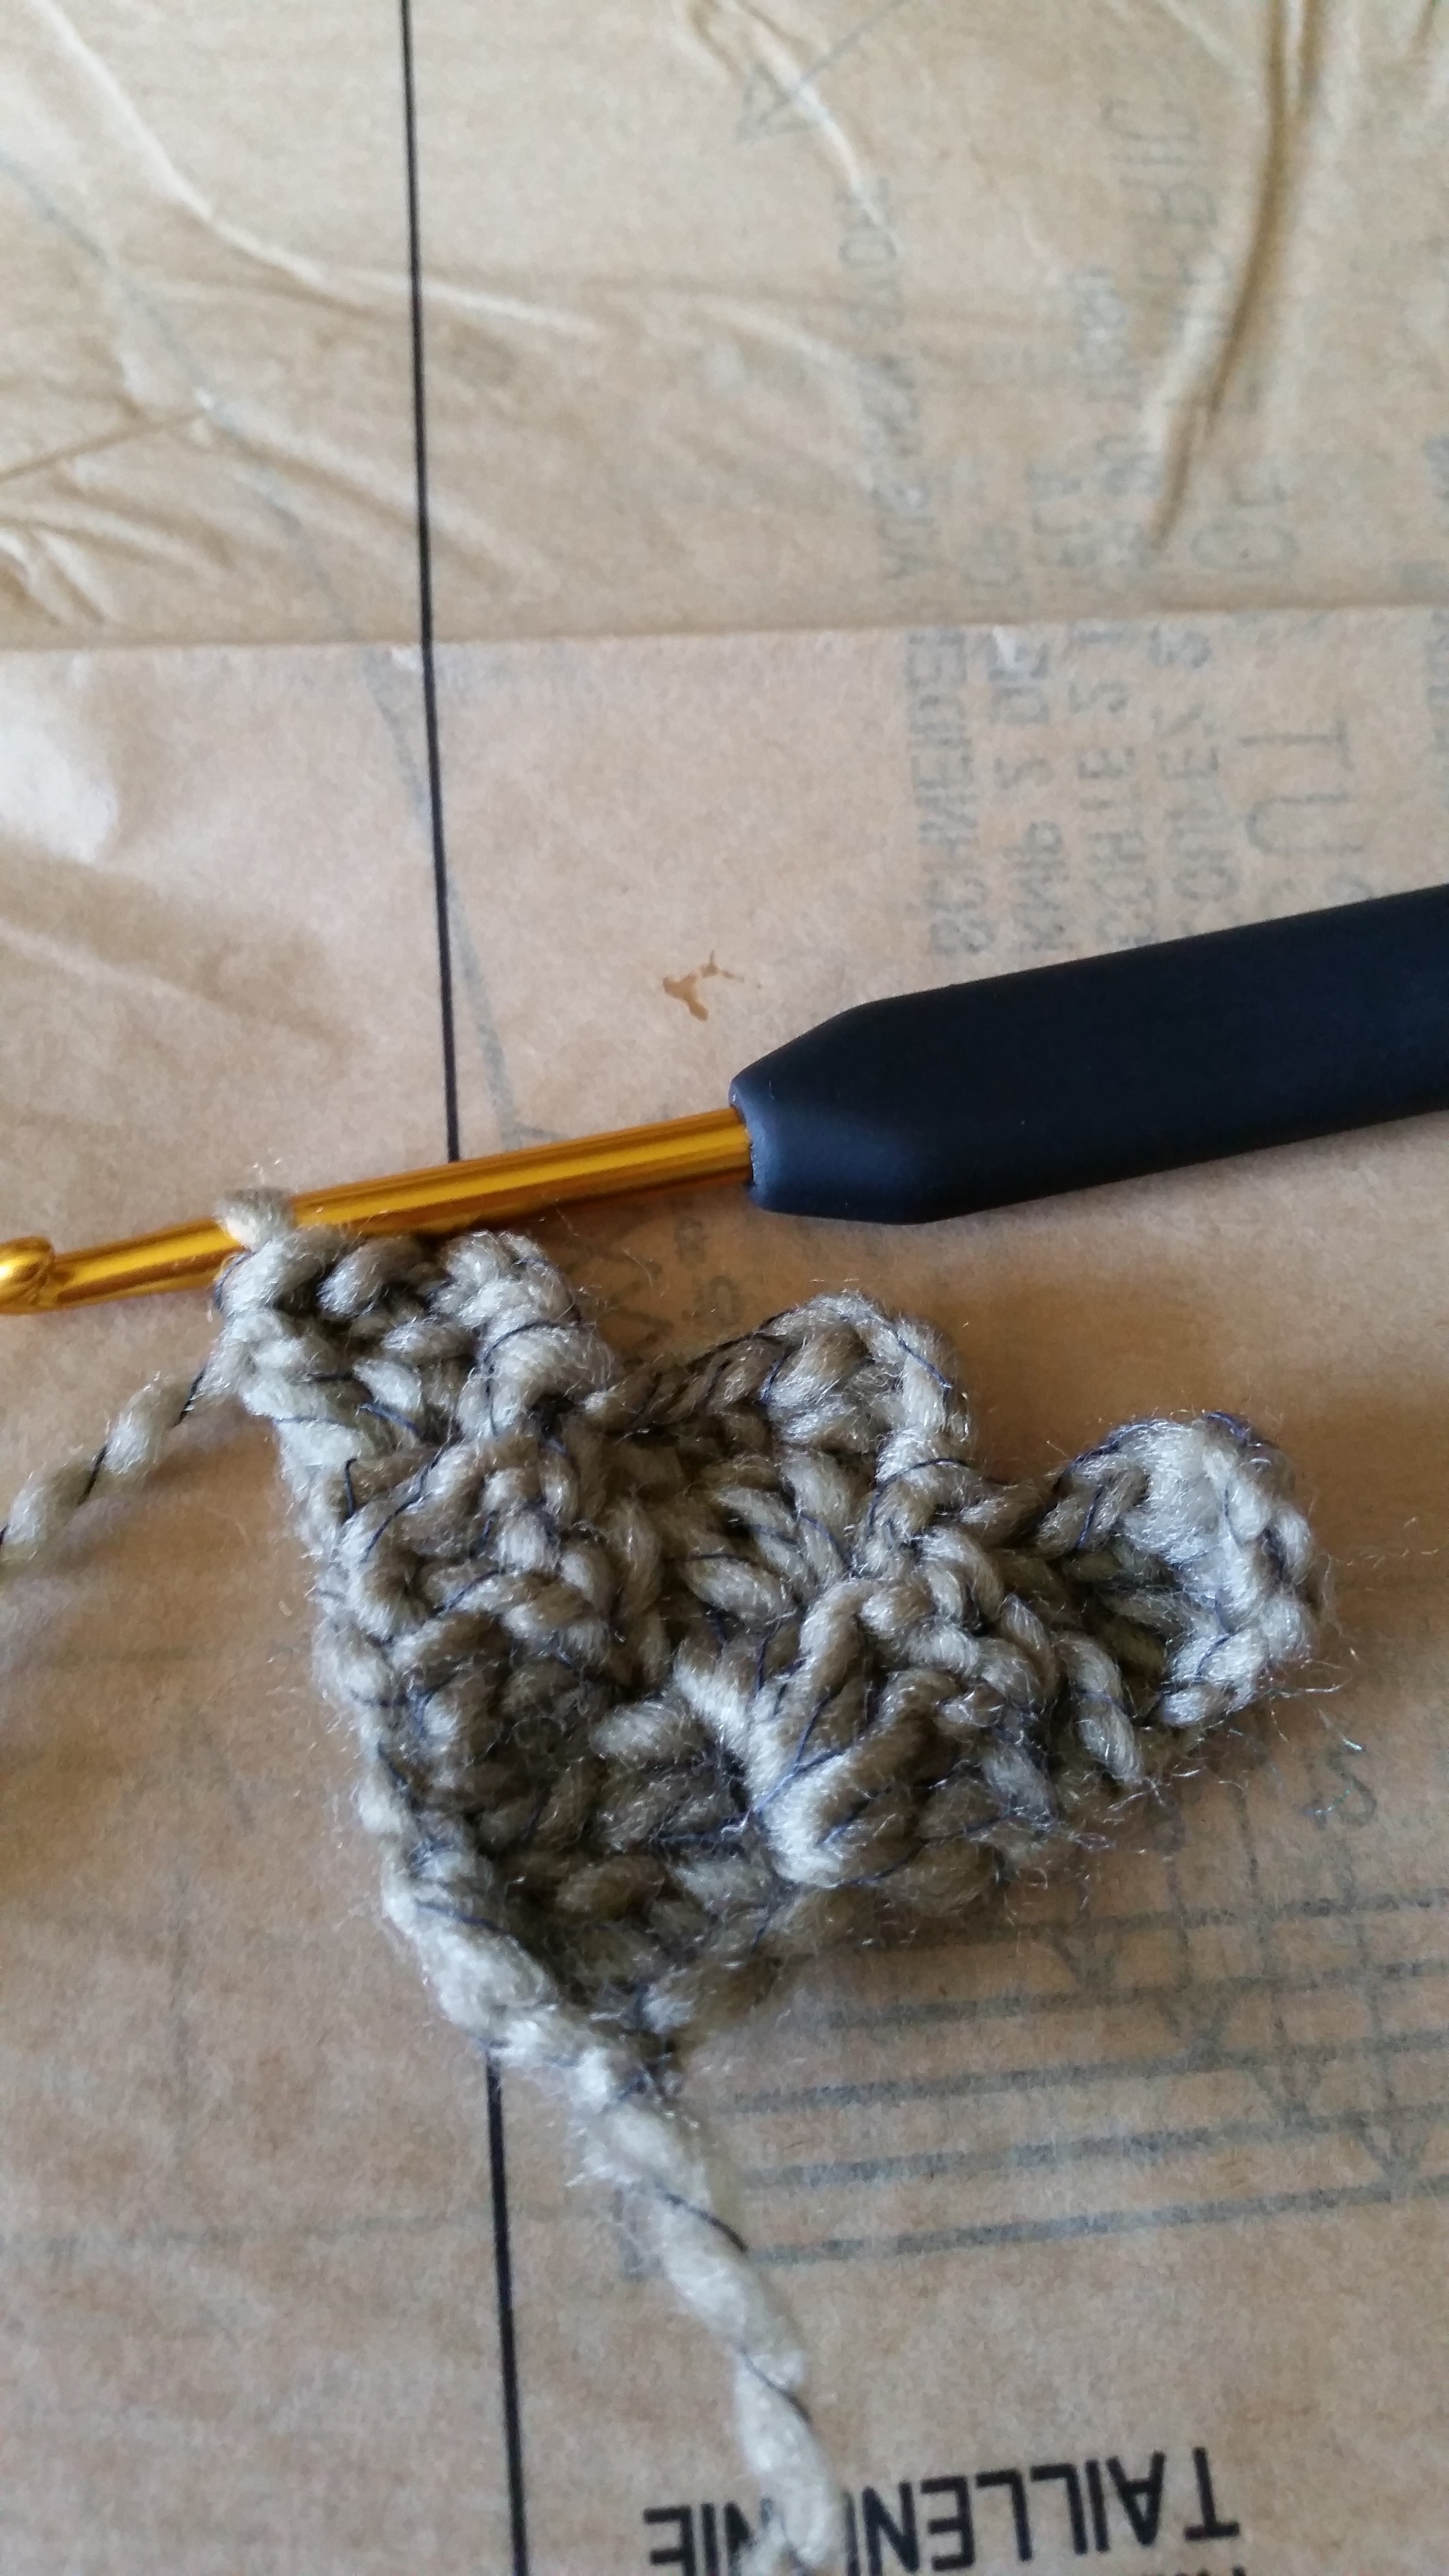
– At this point you will a heart/Y shape. This is your base formation complete
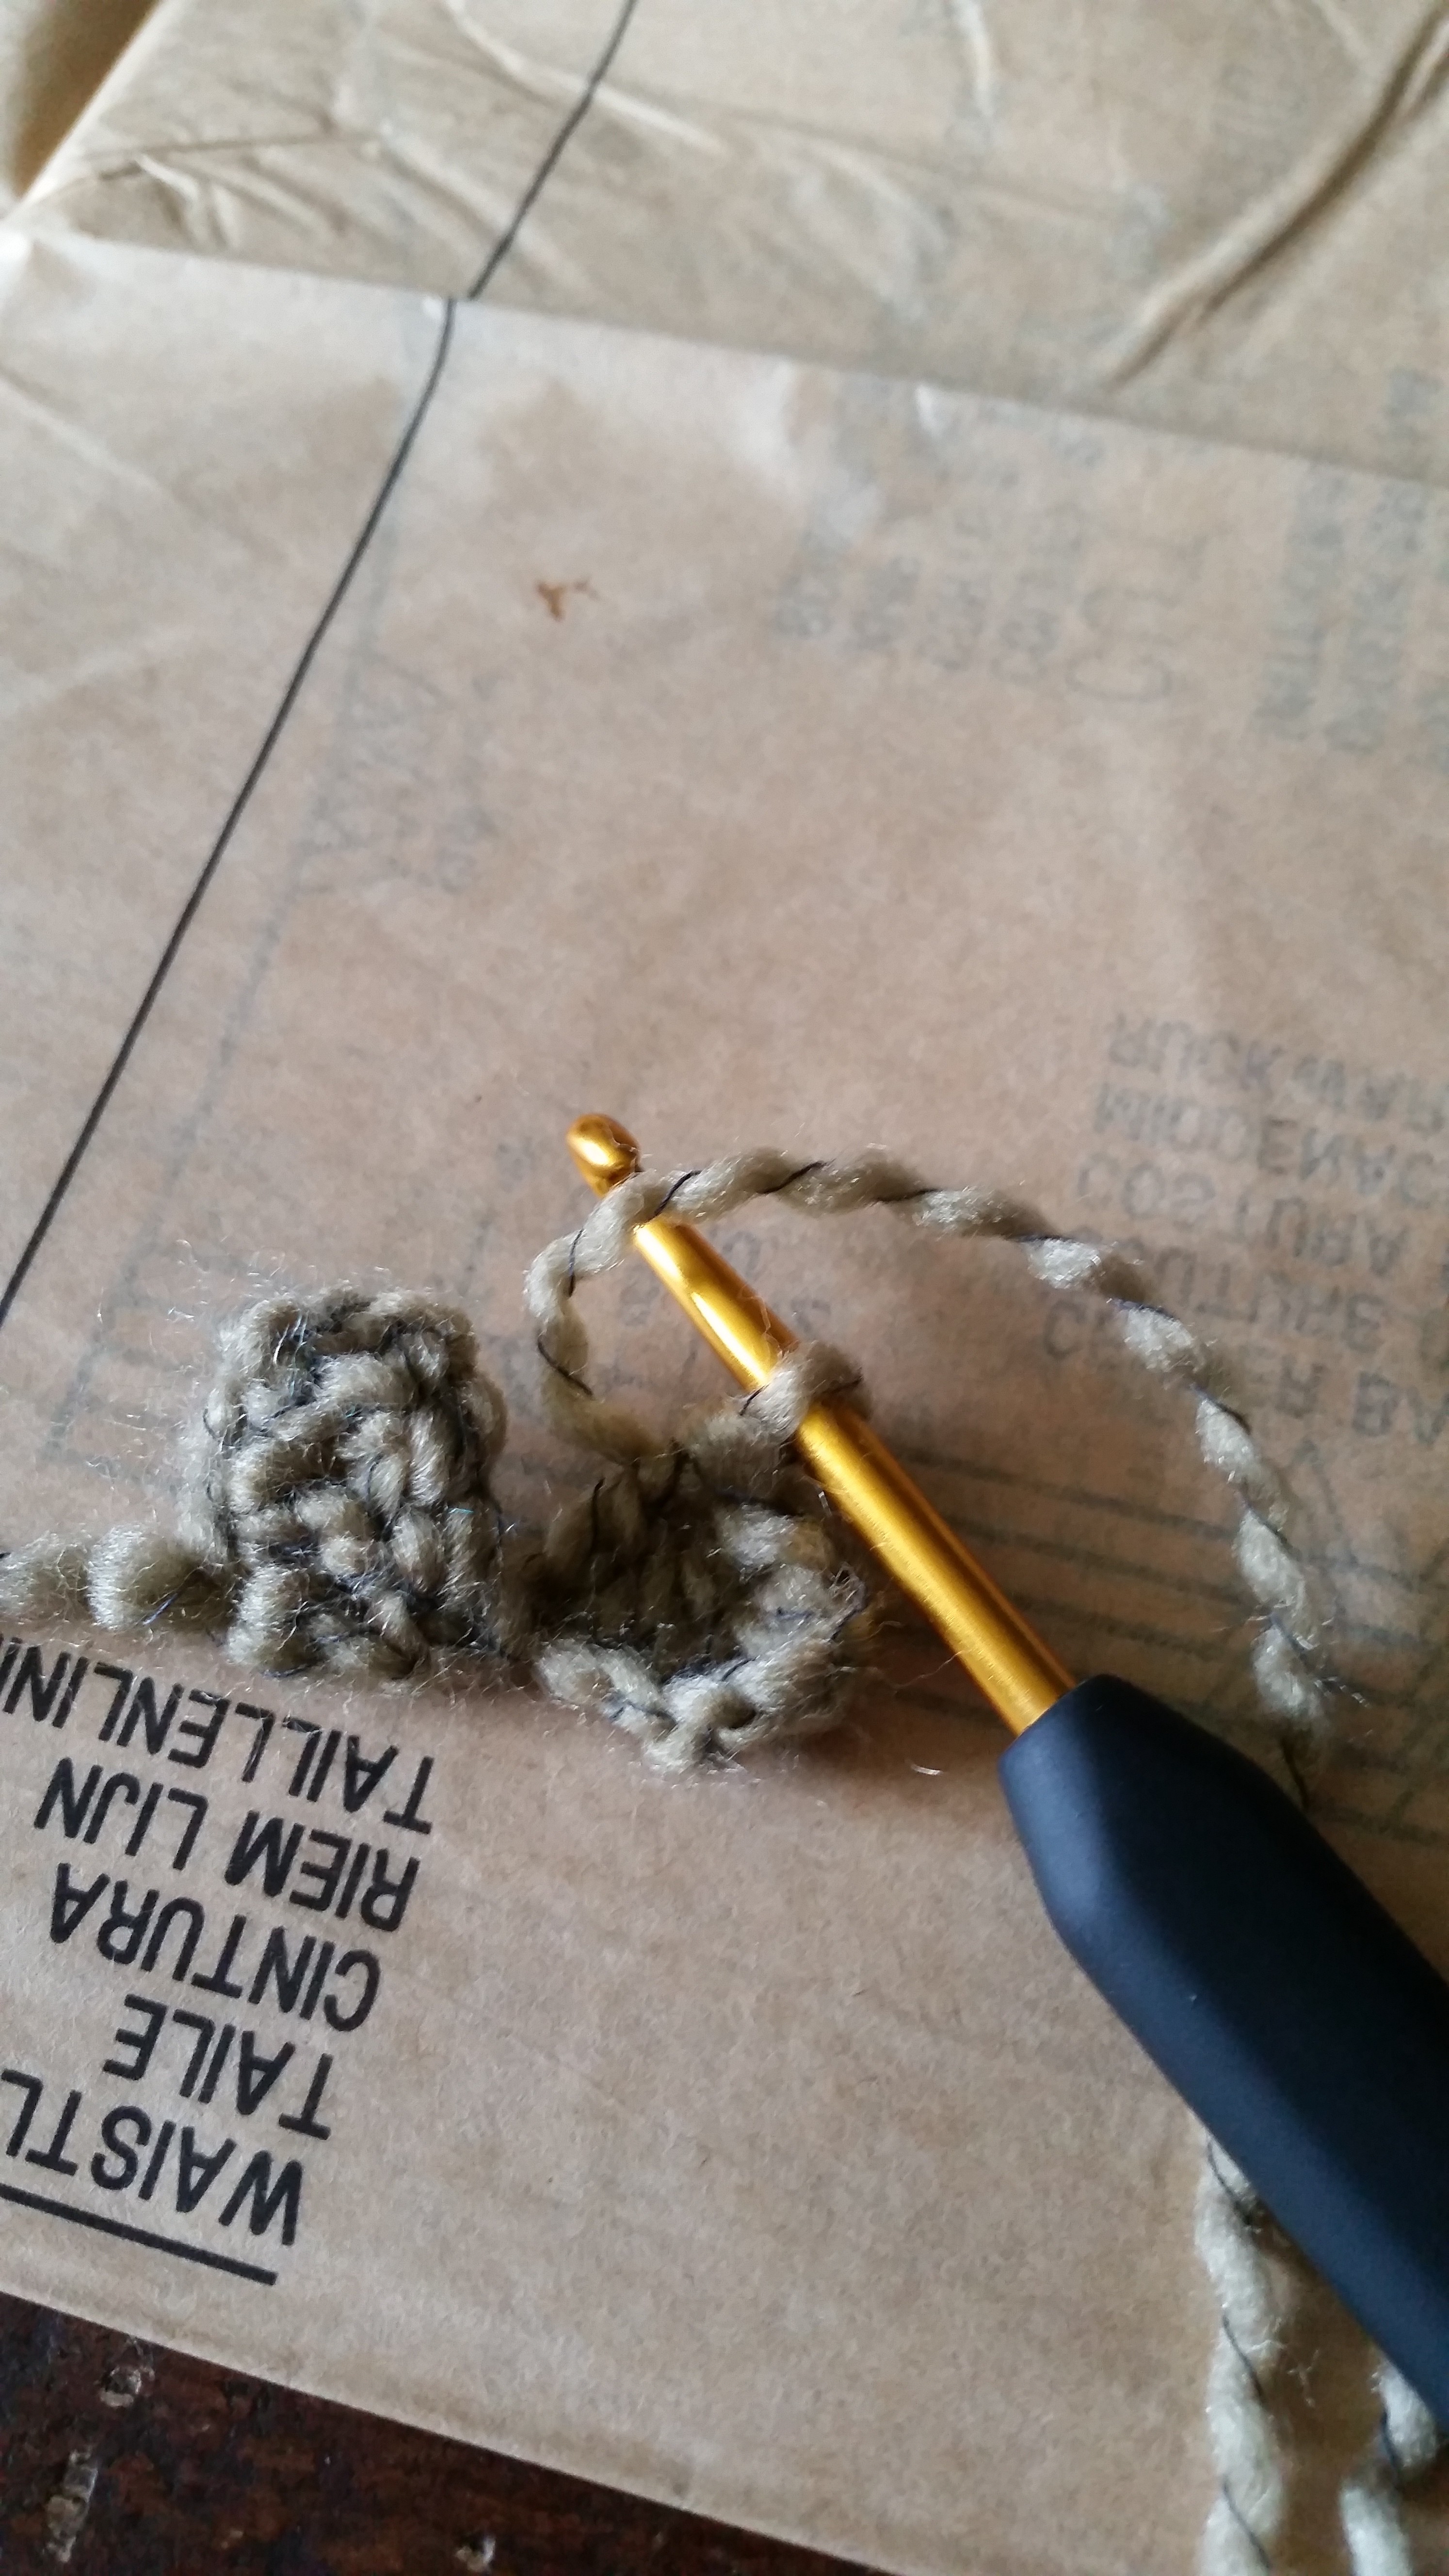
– Turn work and ch 6 (Note in this pic, I didn’t turn my work…Oops)
– Work dc into 4th, 5th and 6th chain
– sl into space and end of block (d)
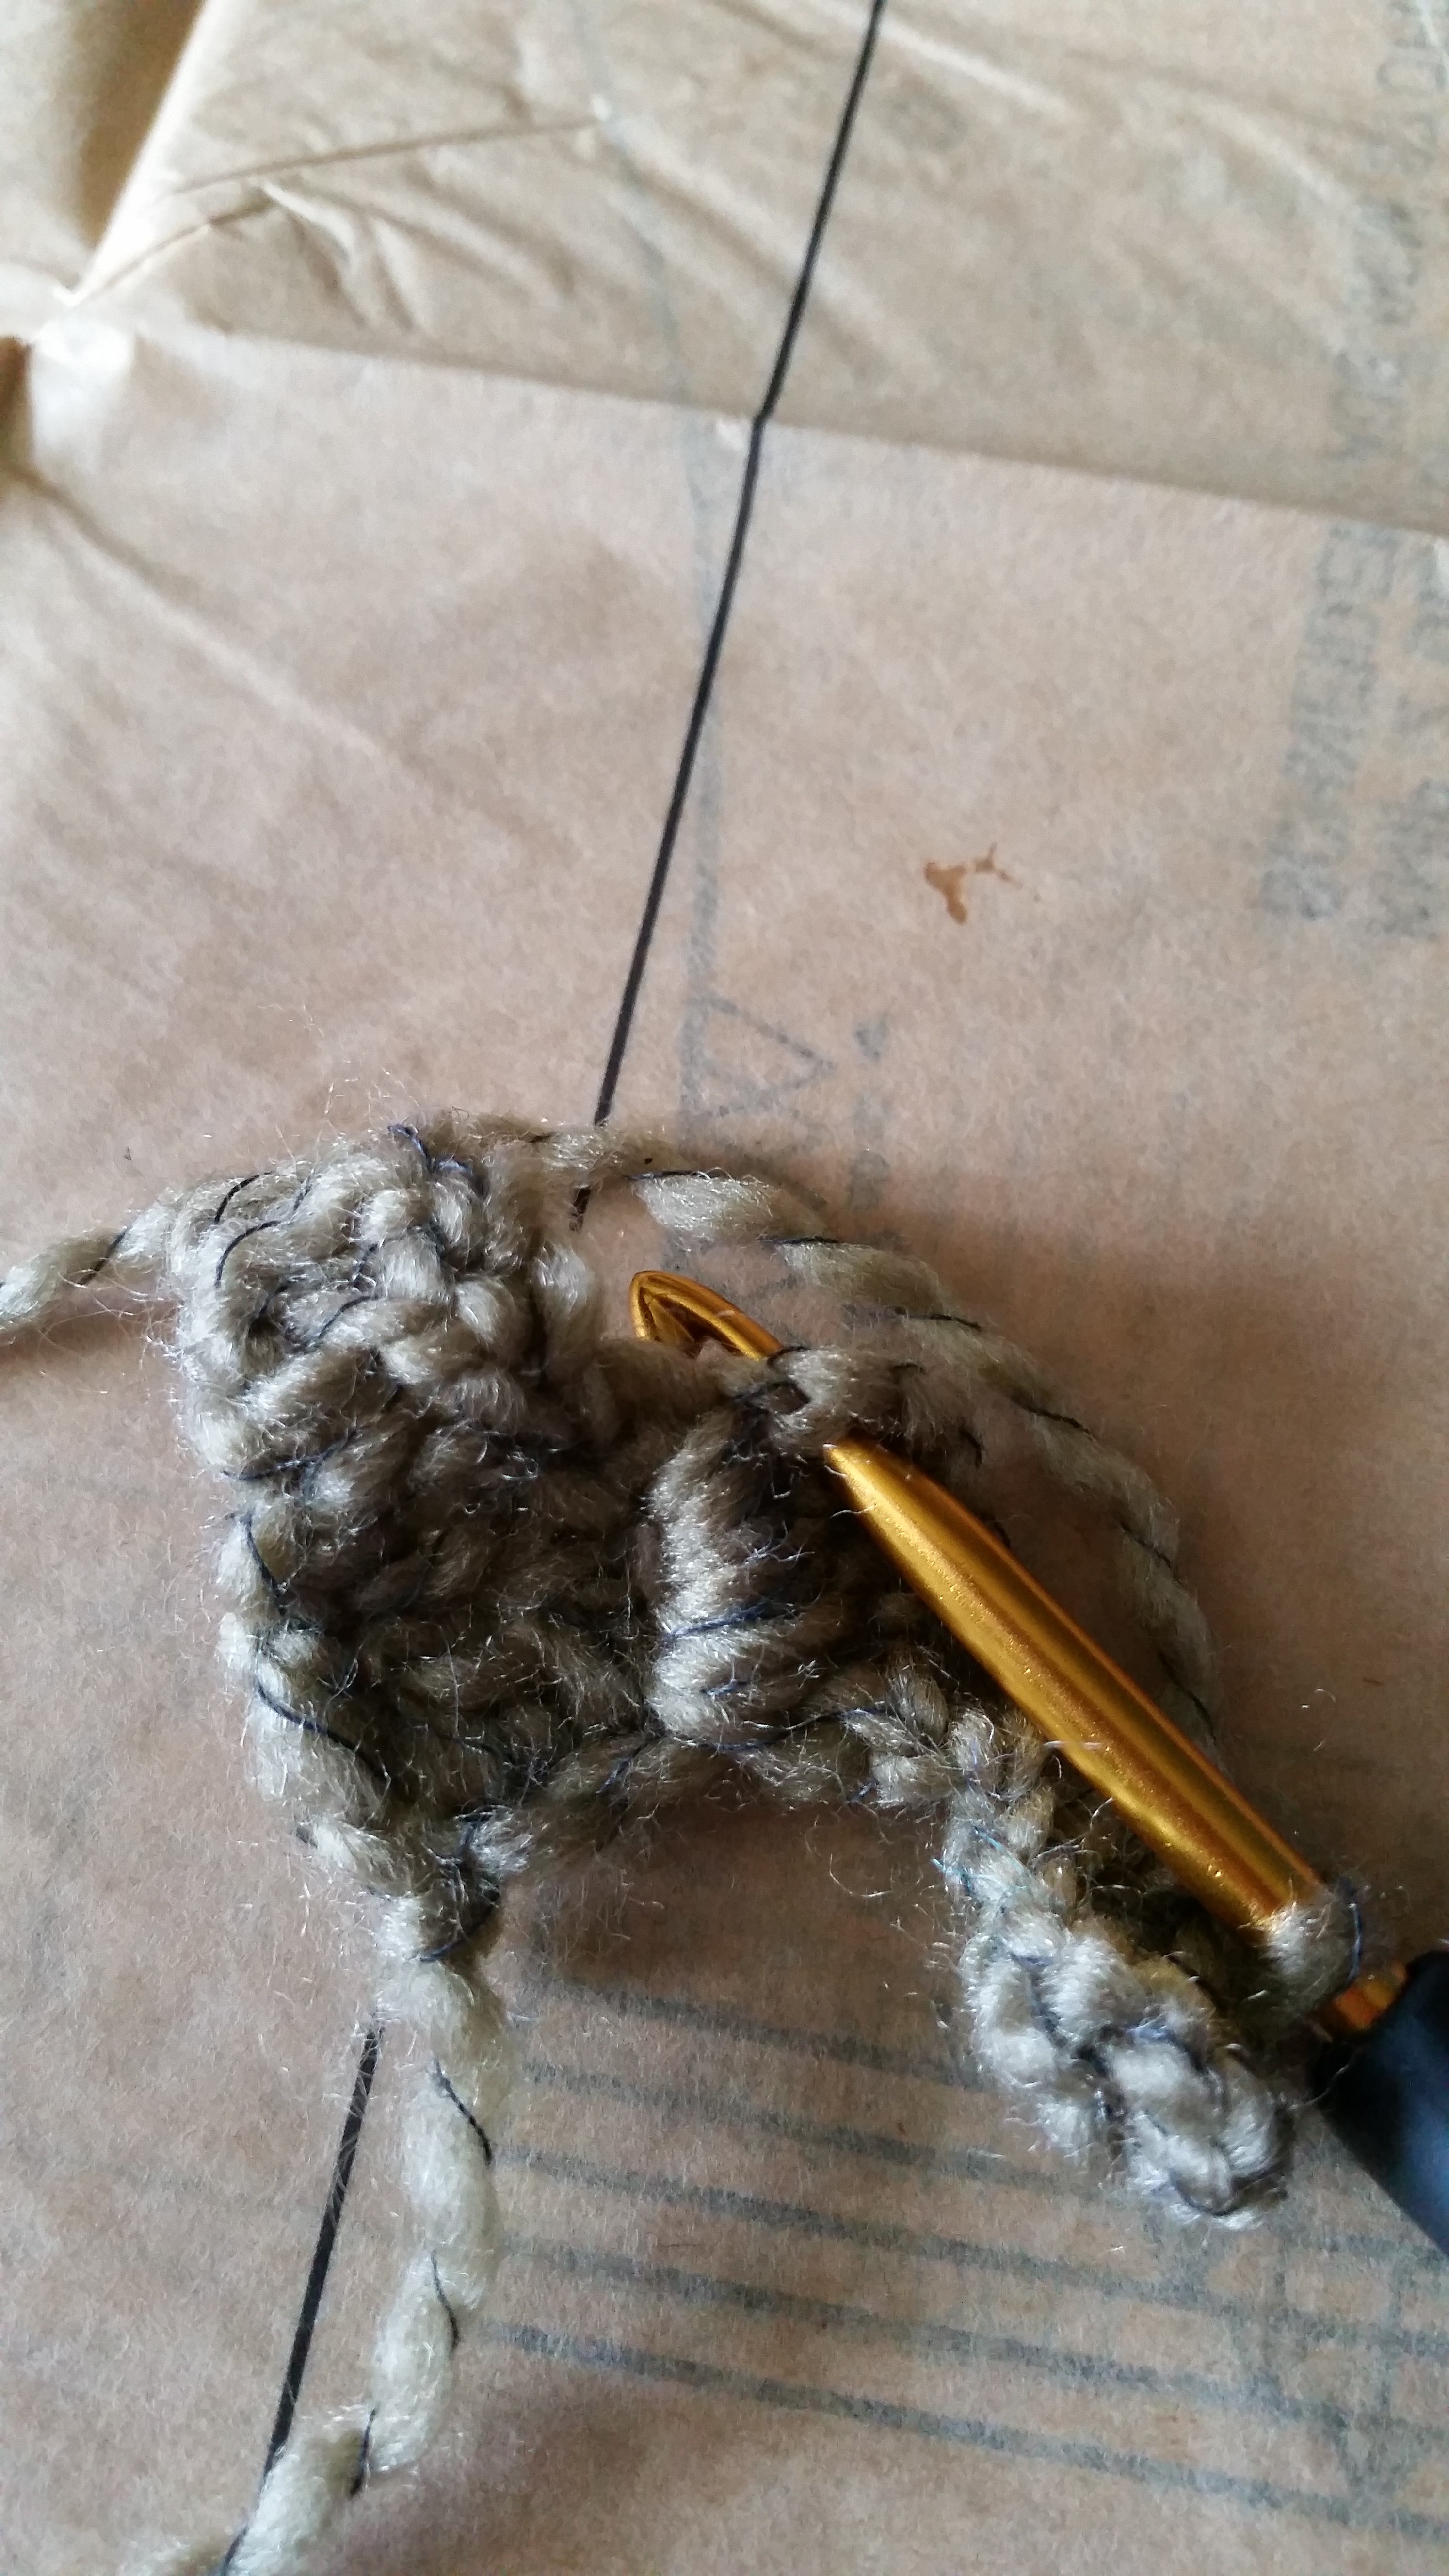
– ch3
– Do 3 dc into same space
– Continue this pattern to end of row

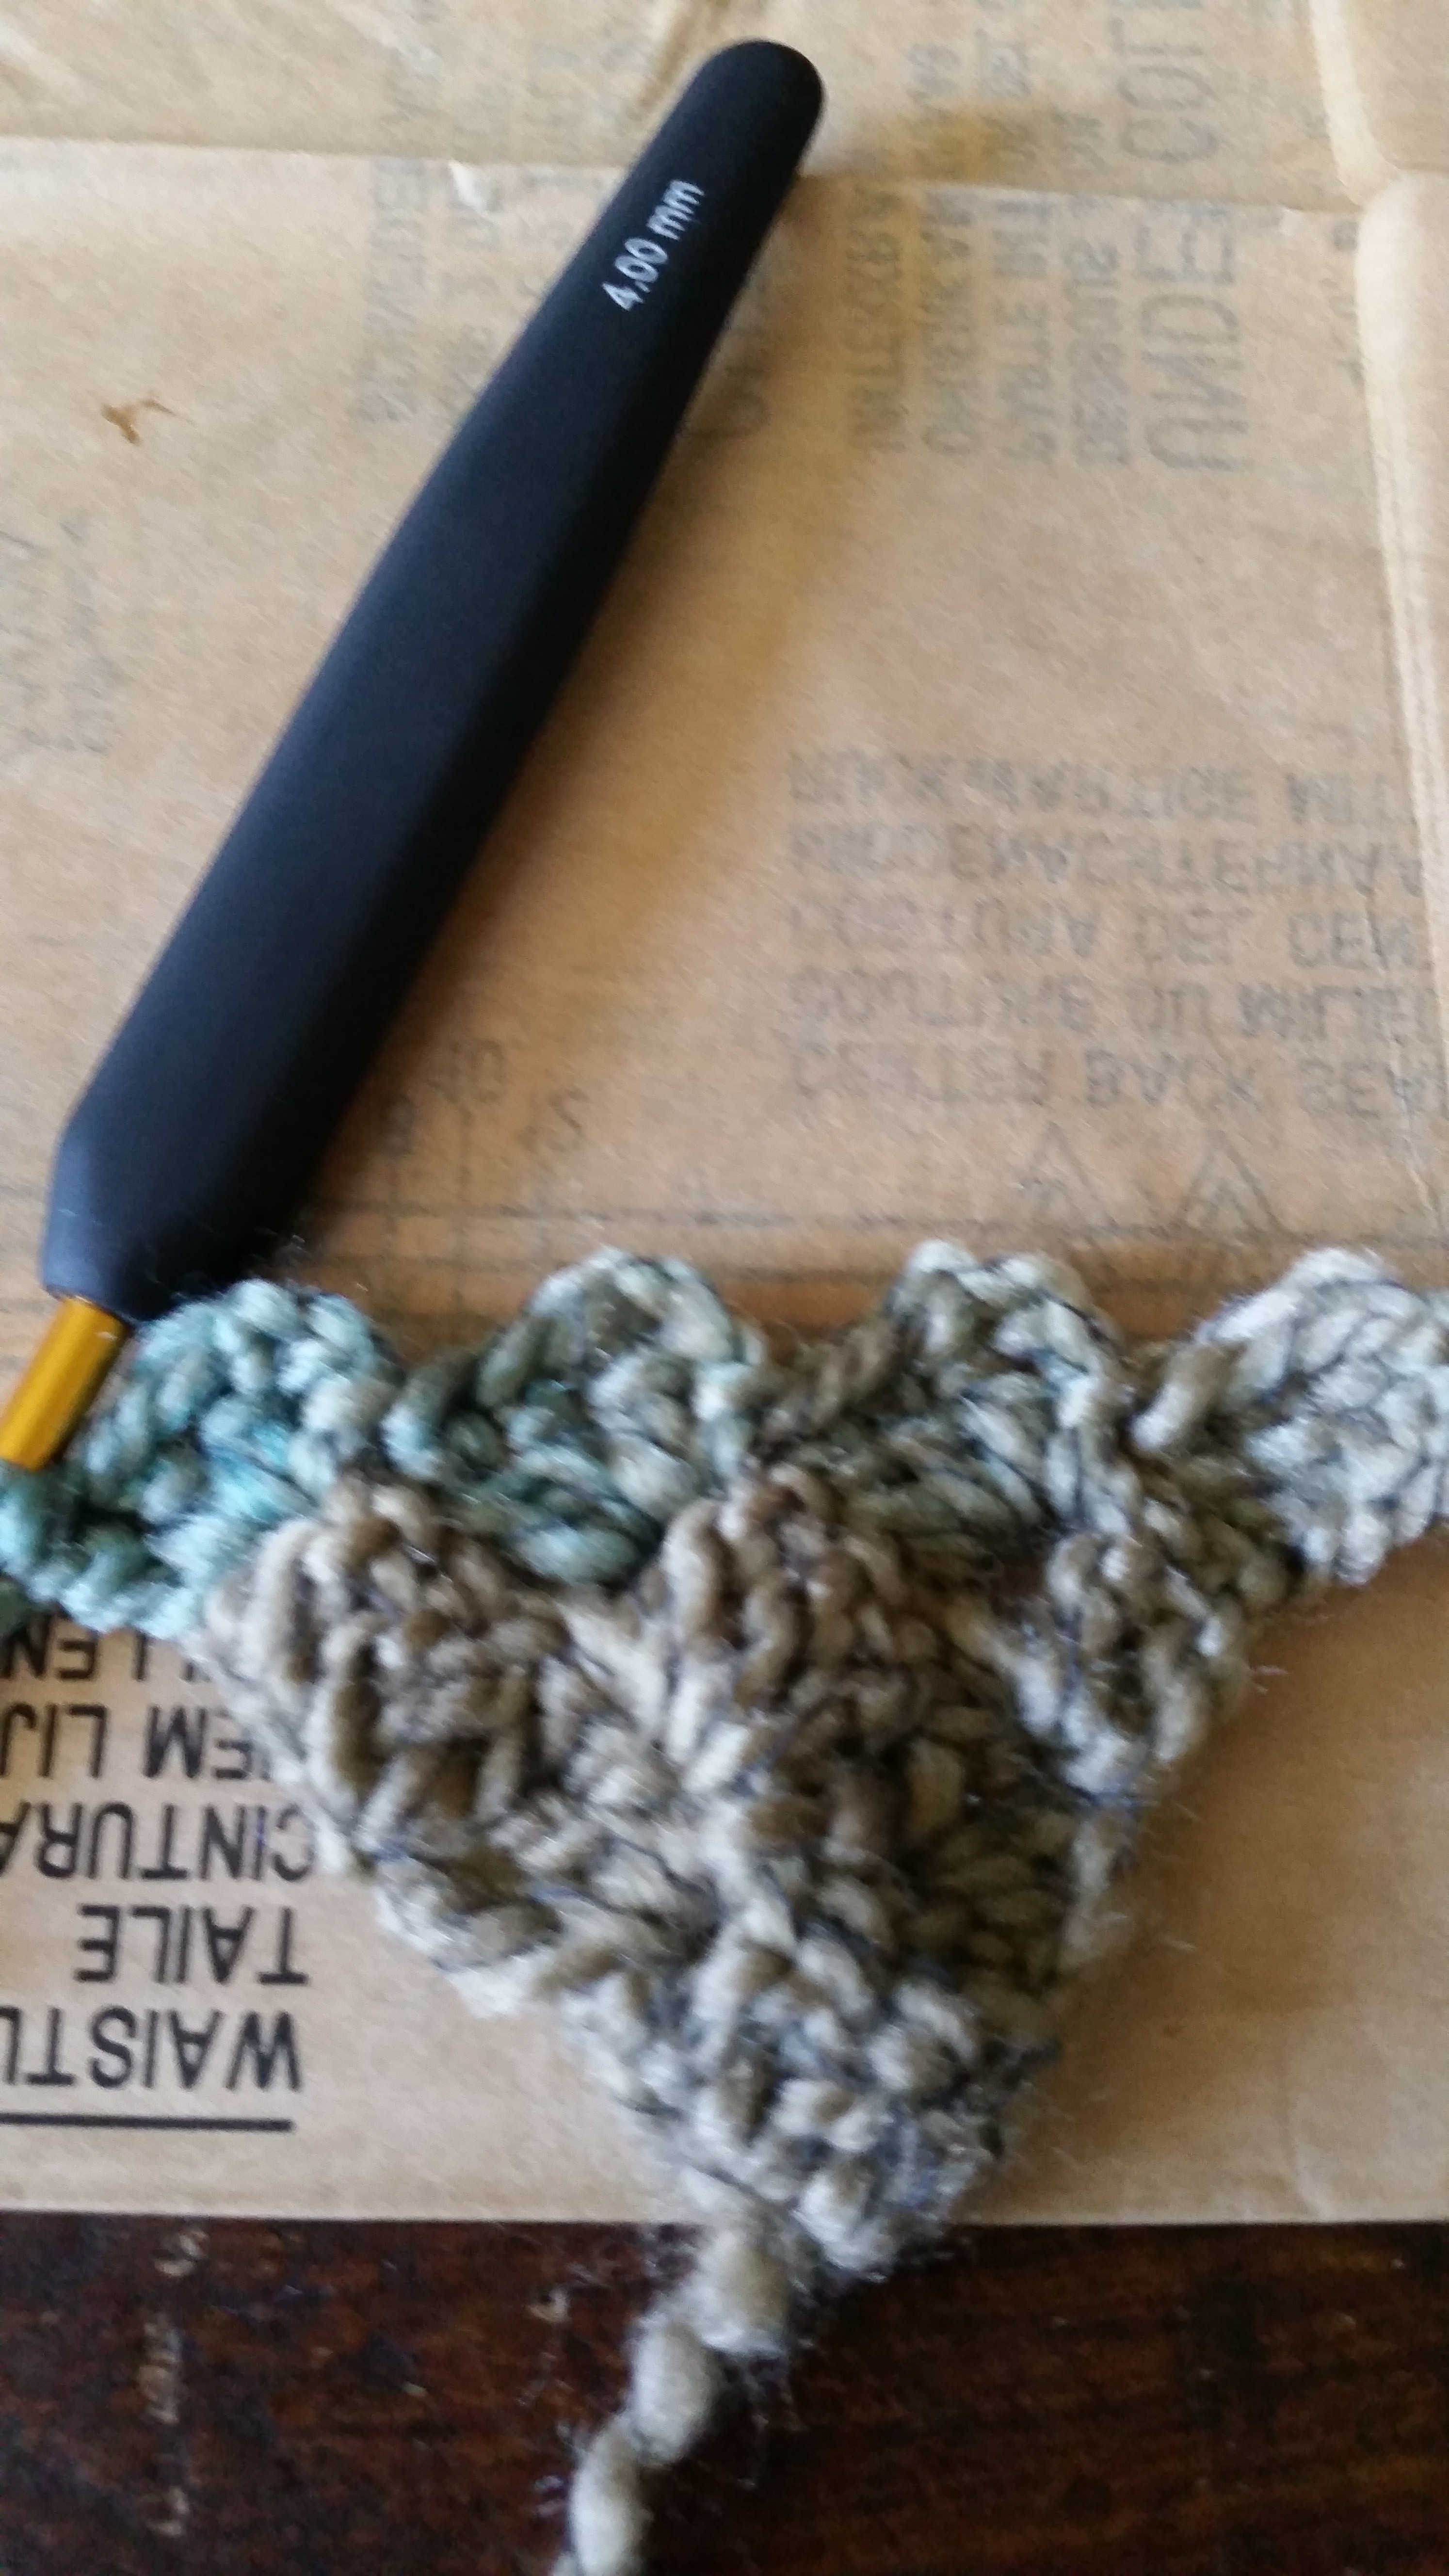
– Turn your work and chain six. Work dc into 4th 5th and 6th chain from hook. connect to space in next block with sl st. Chain 3, work 3 dc into same space.
This is very simple once you get the base bit completed.
Jump over to next space and sl st and just keep repeating the above to end of row.
You can change colour every row, every 5 rows, its totally up to you. The Maypole yarn self changes colour. They blend beautifully into each other.
Keep building until you have the size you want it to get to, I haven’t got quite the size I want yet.
I hope you under stand all of the directions of the tutorial.
Pop back over to the blog to see how to decrease your work back into a square shape
Charlene
ENJOY! 🙂


Comments are closed.