Corner to Corner Tutorial – Part 2 (How to decrease your blanket)
I hope you have all got on ok with the first part of the tutorial and have been able to make sense of it. I was just thinking after publishing it, one thing I forgot to mention was that I used the US terms to do the pattern, Apologies if there was any confusions here.
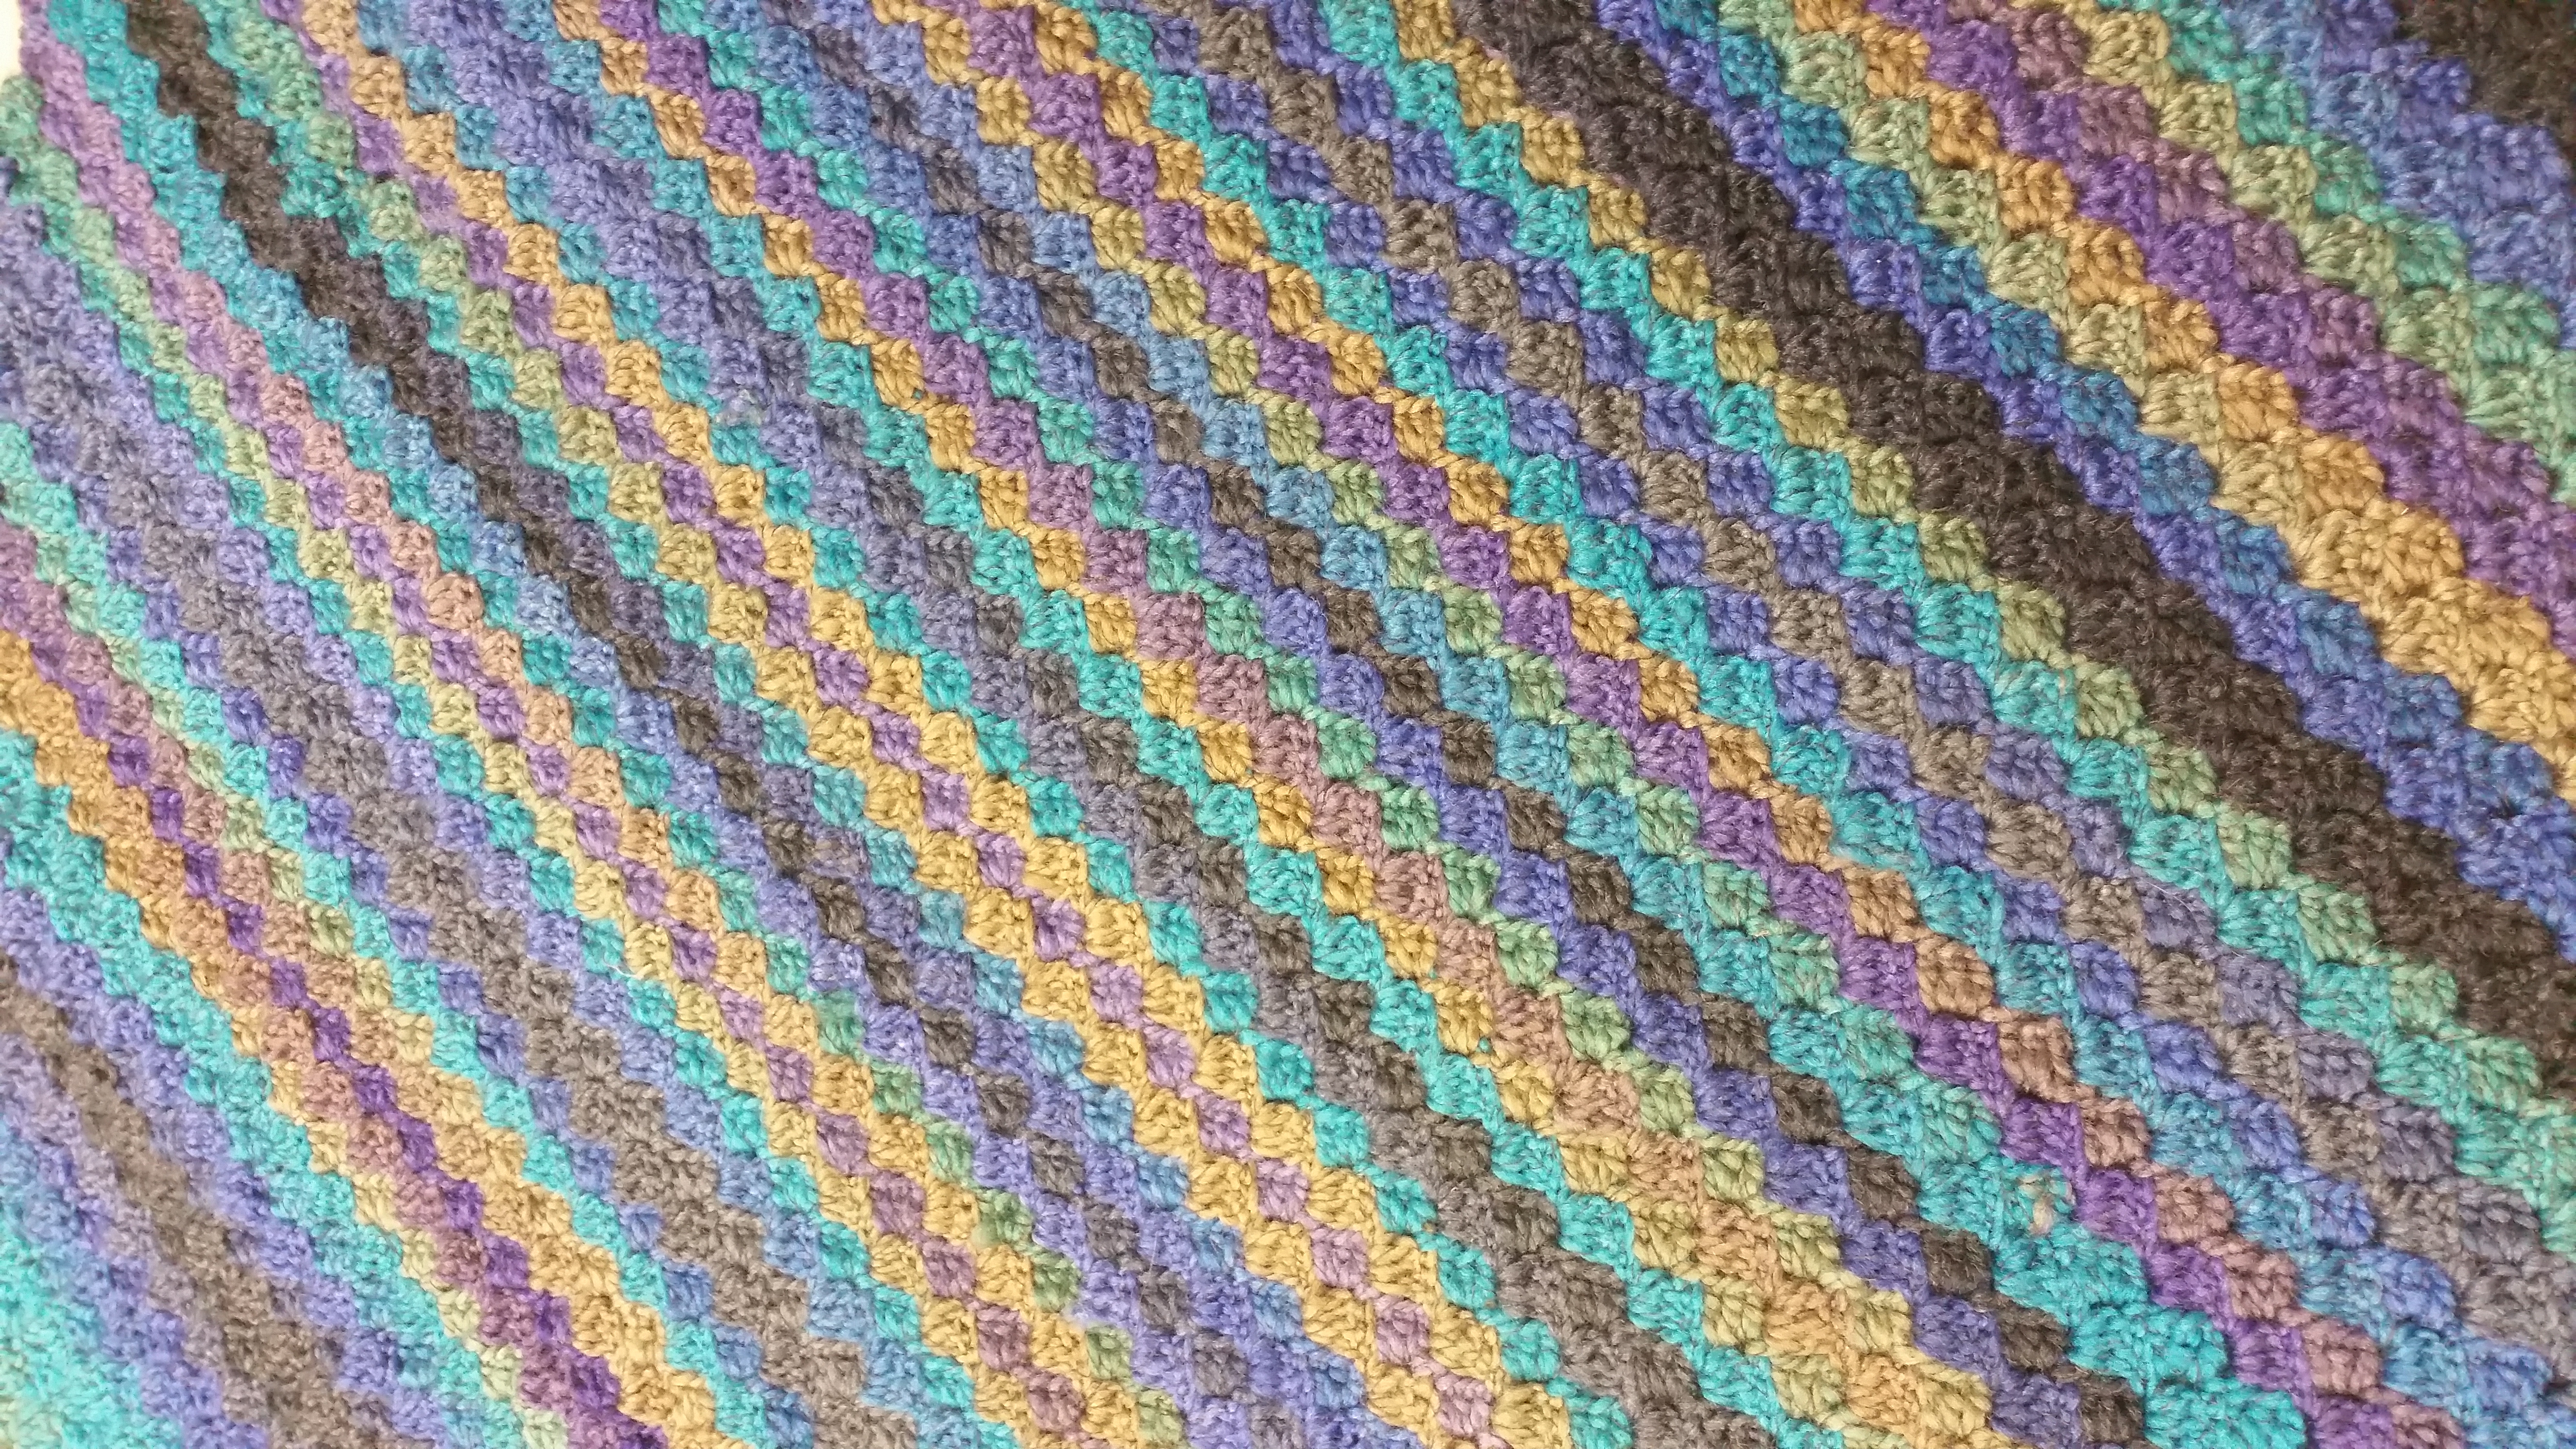
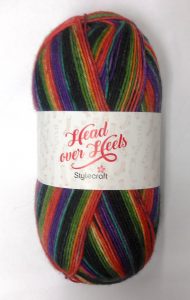
I have to say I found the Maypole dk yarn so effective to use on this project with it changing colour itself, they all blend so nicely into each other plus it saves on weaving in lots of ends Hooray to that!.
Now if you have your triangle shape to the size you want, you want to start and get the mirror image of this to make it into a square, so what you need to do is:
– 1. do a row as normal
– 2. when you get to the last block of the row below
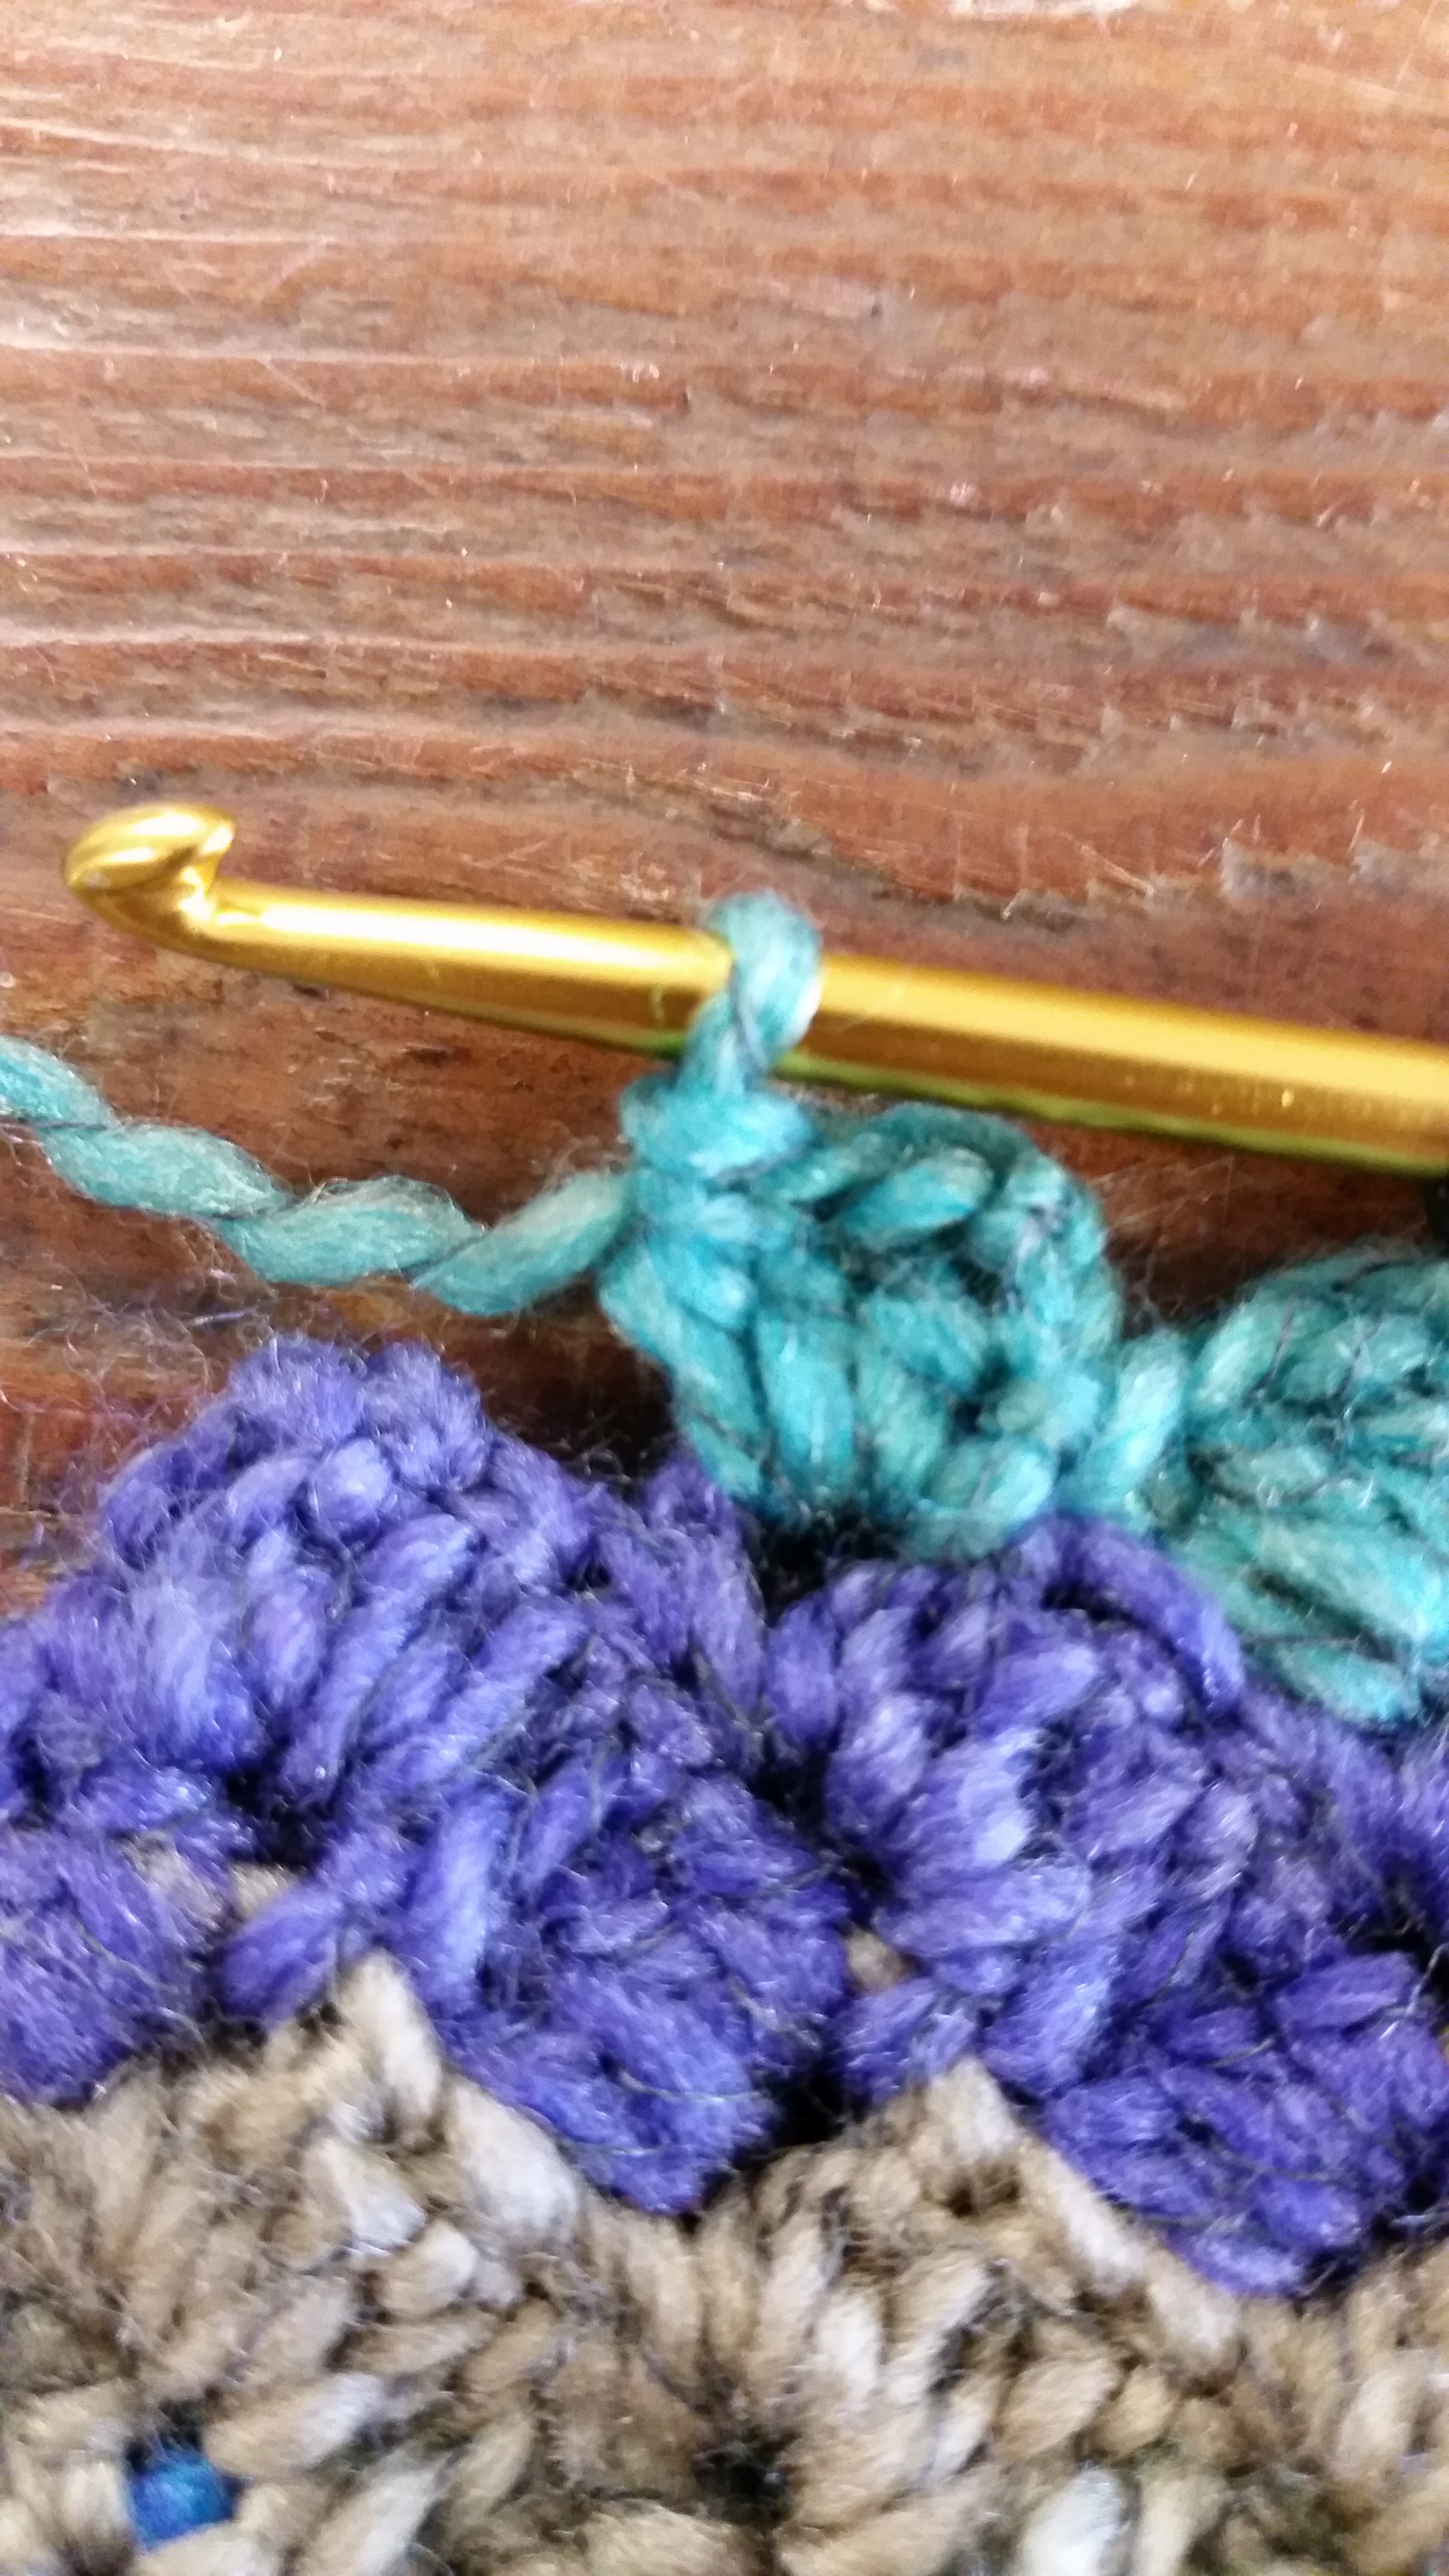
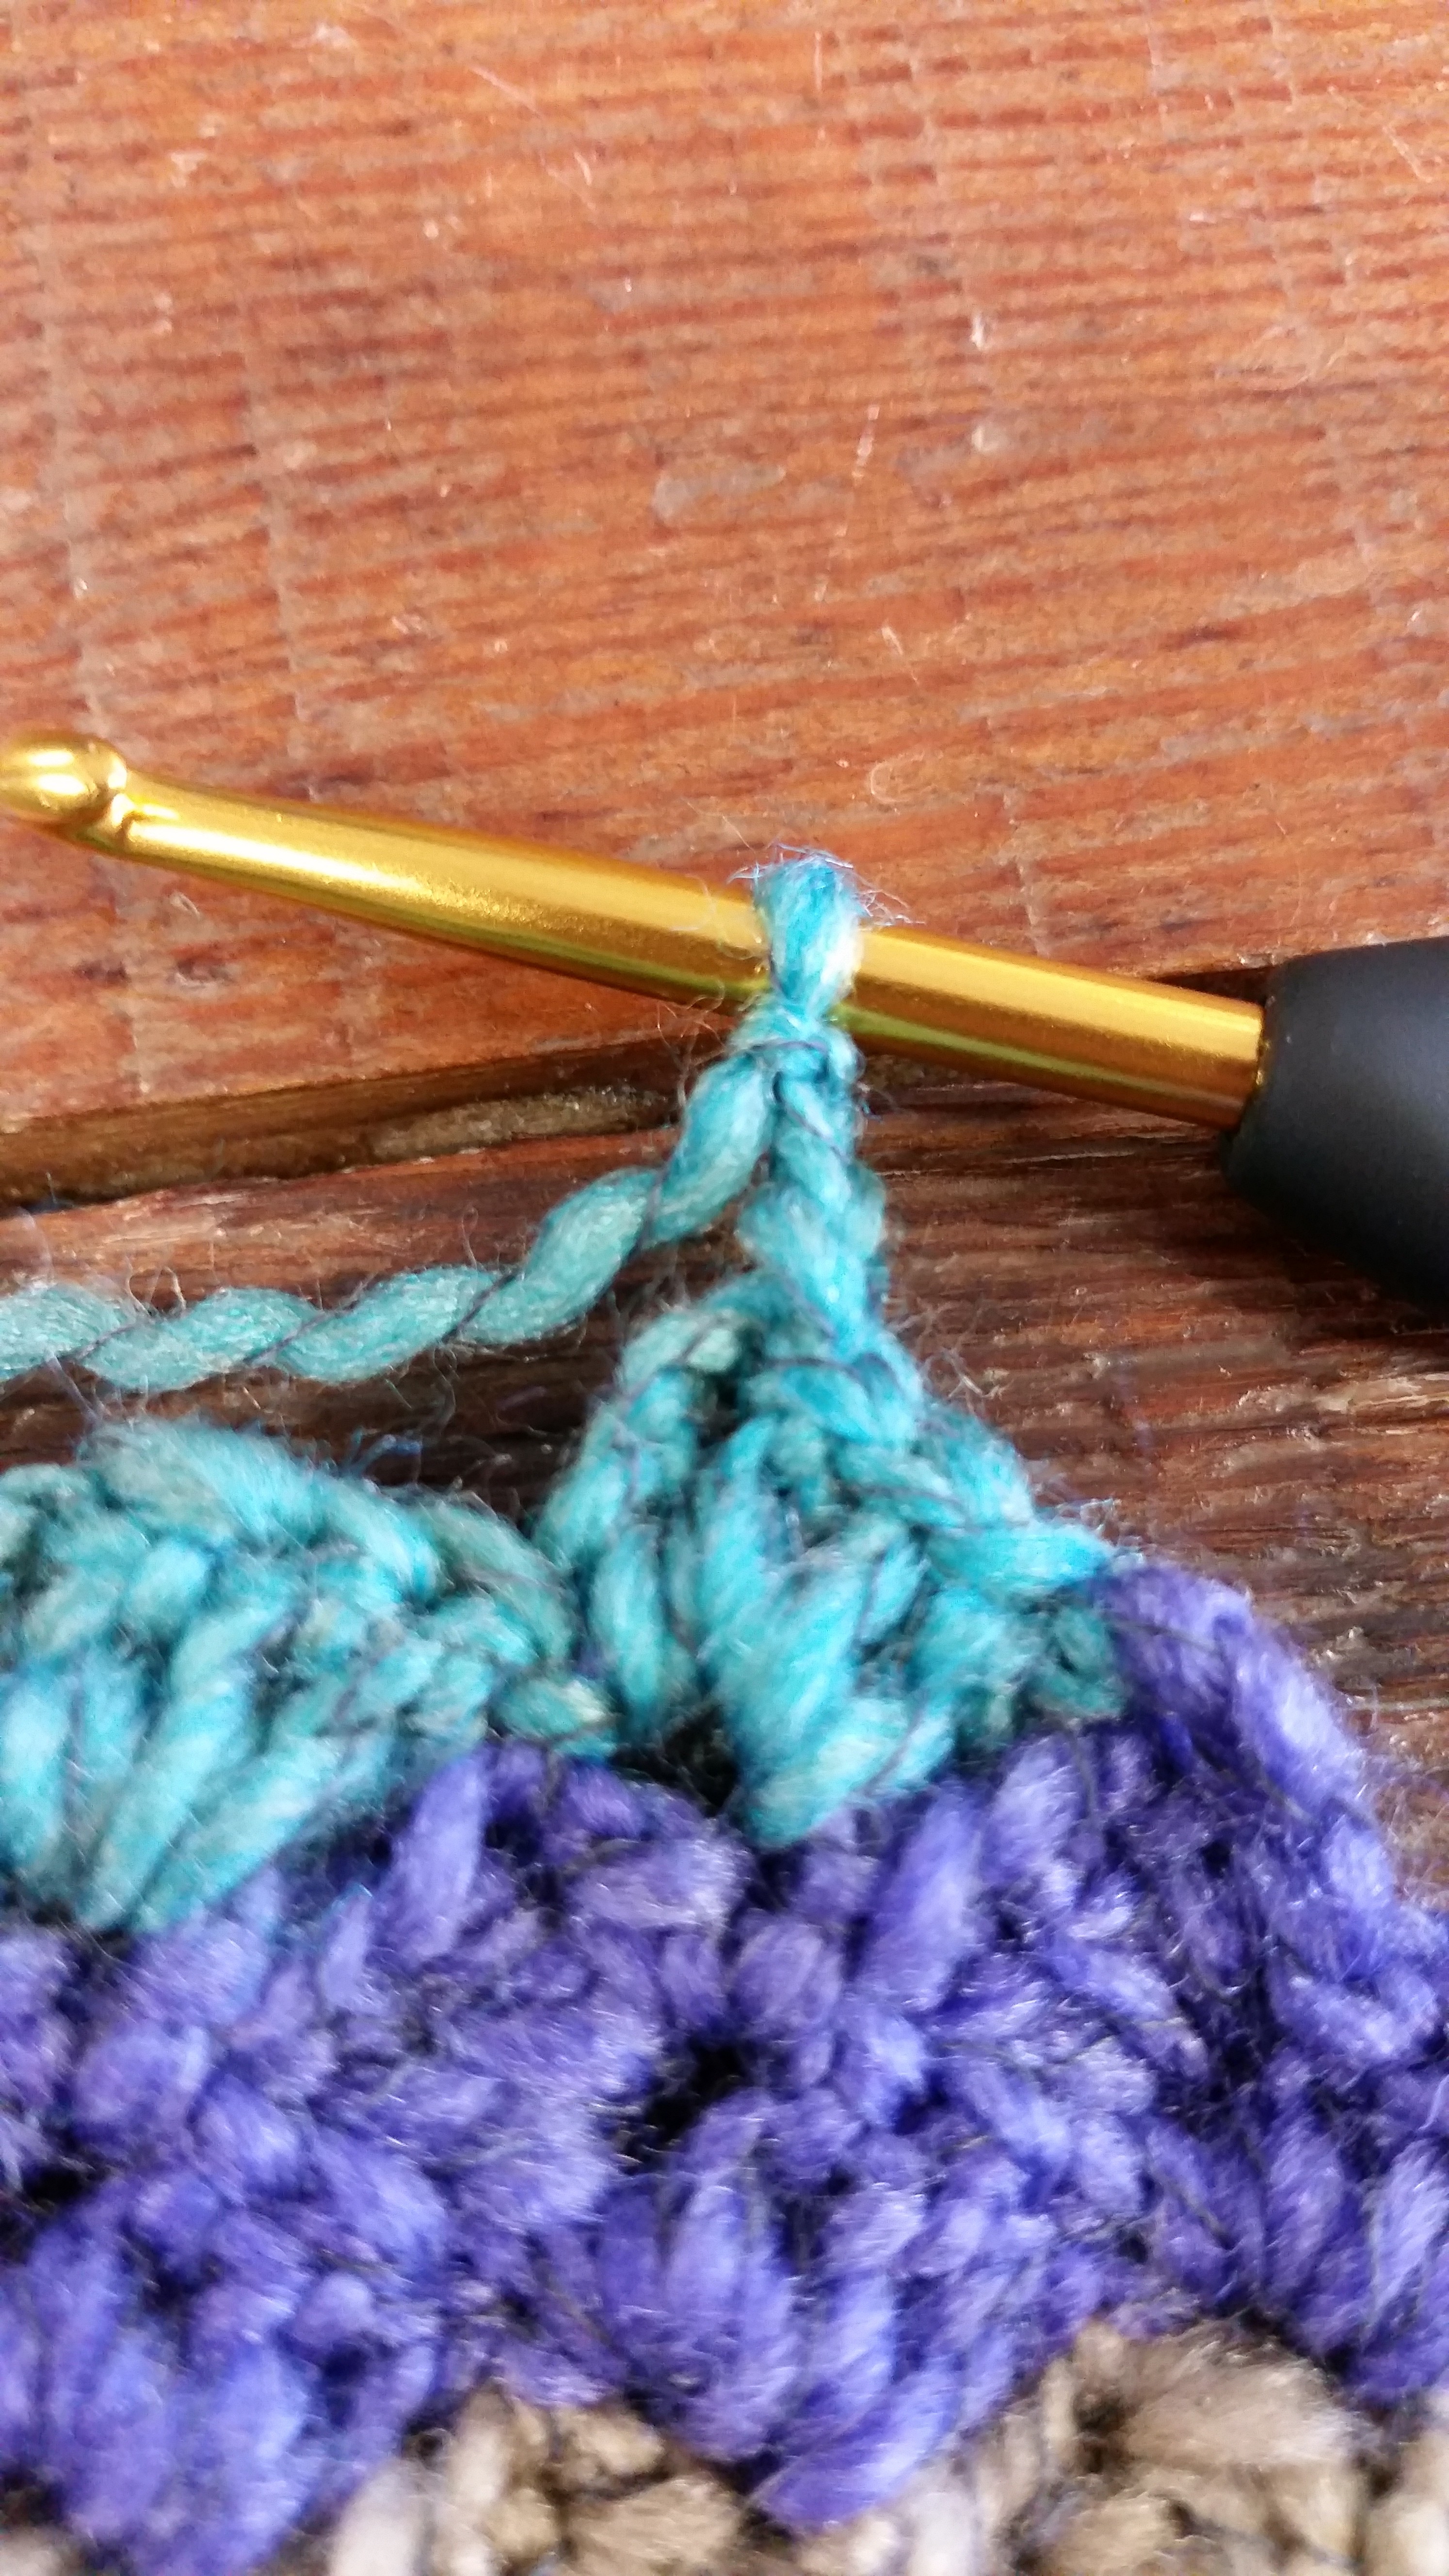
– 3. insert your hook into space and slip stitch (at this point you would normally chain 3 and do a set of dc’s)
– 4. turn your work and instead of chaining 6, look at the spaces between your dc’s, insert your yarn into the 1st space, and slip stitch
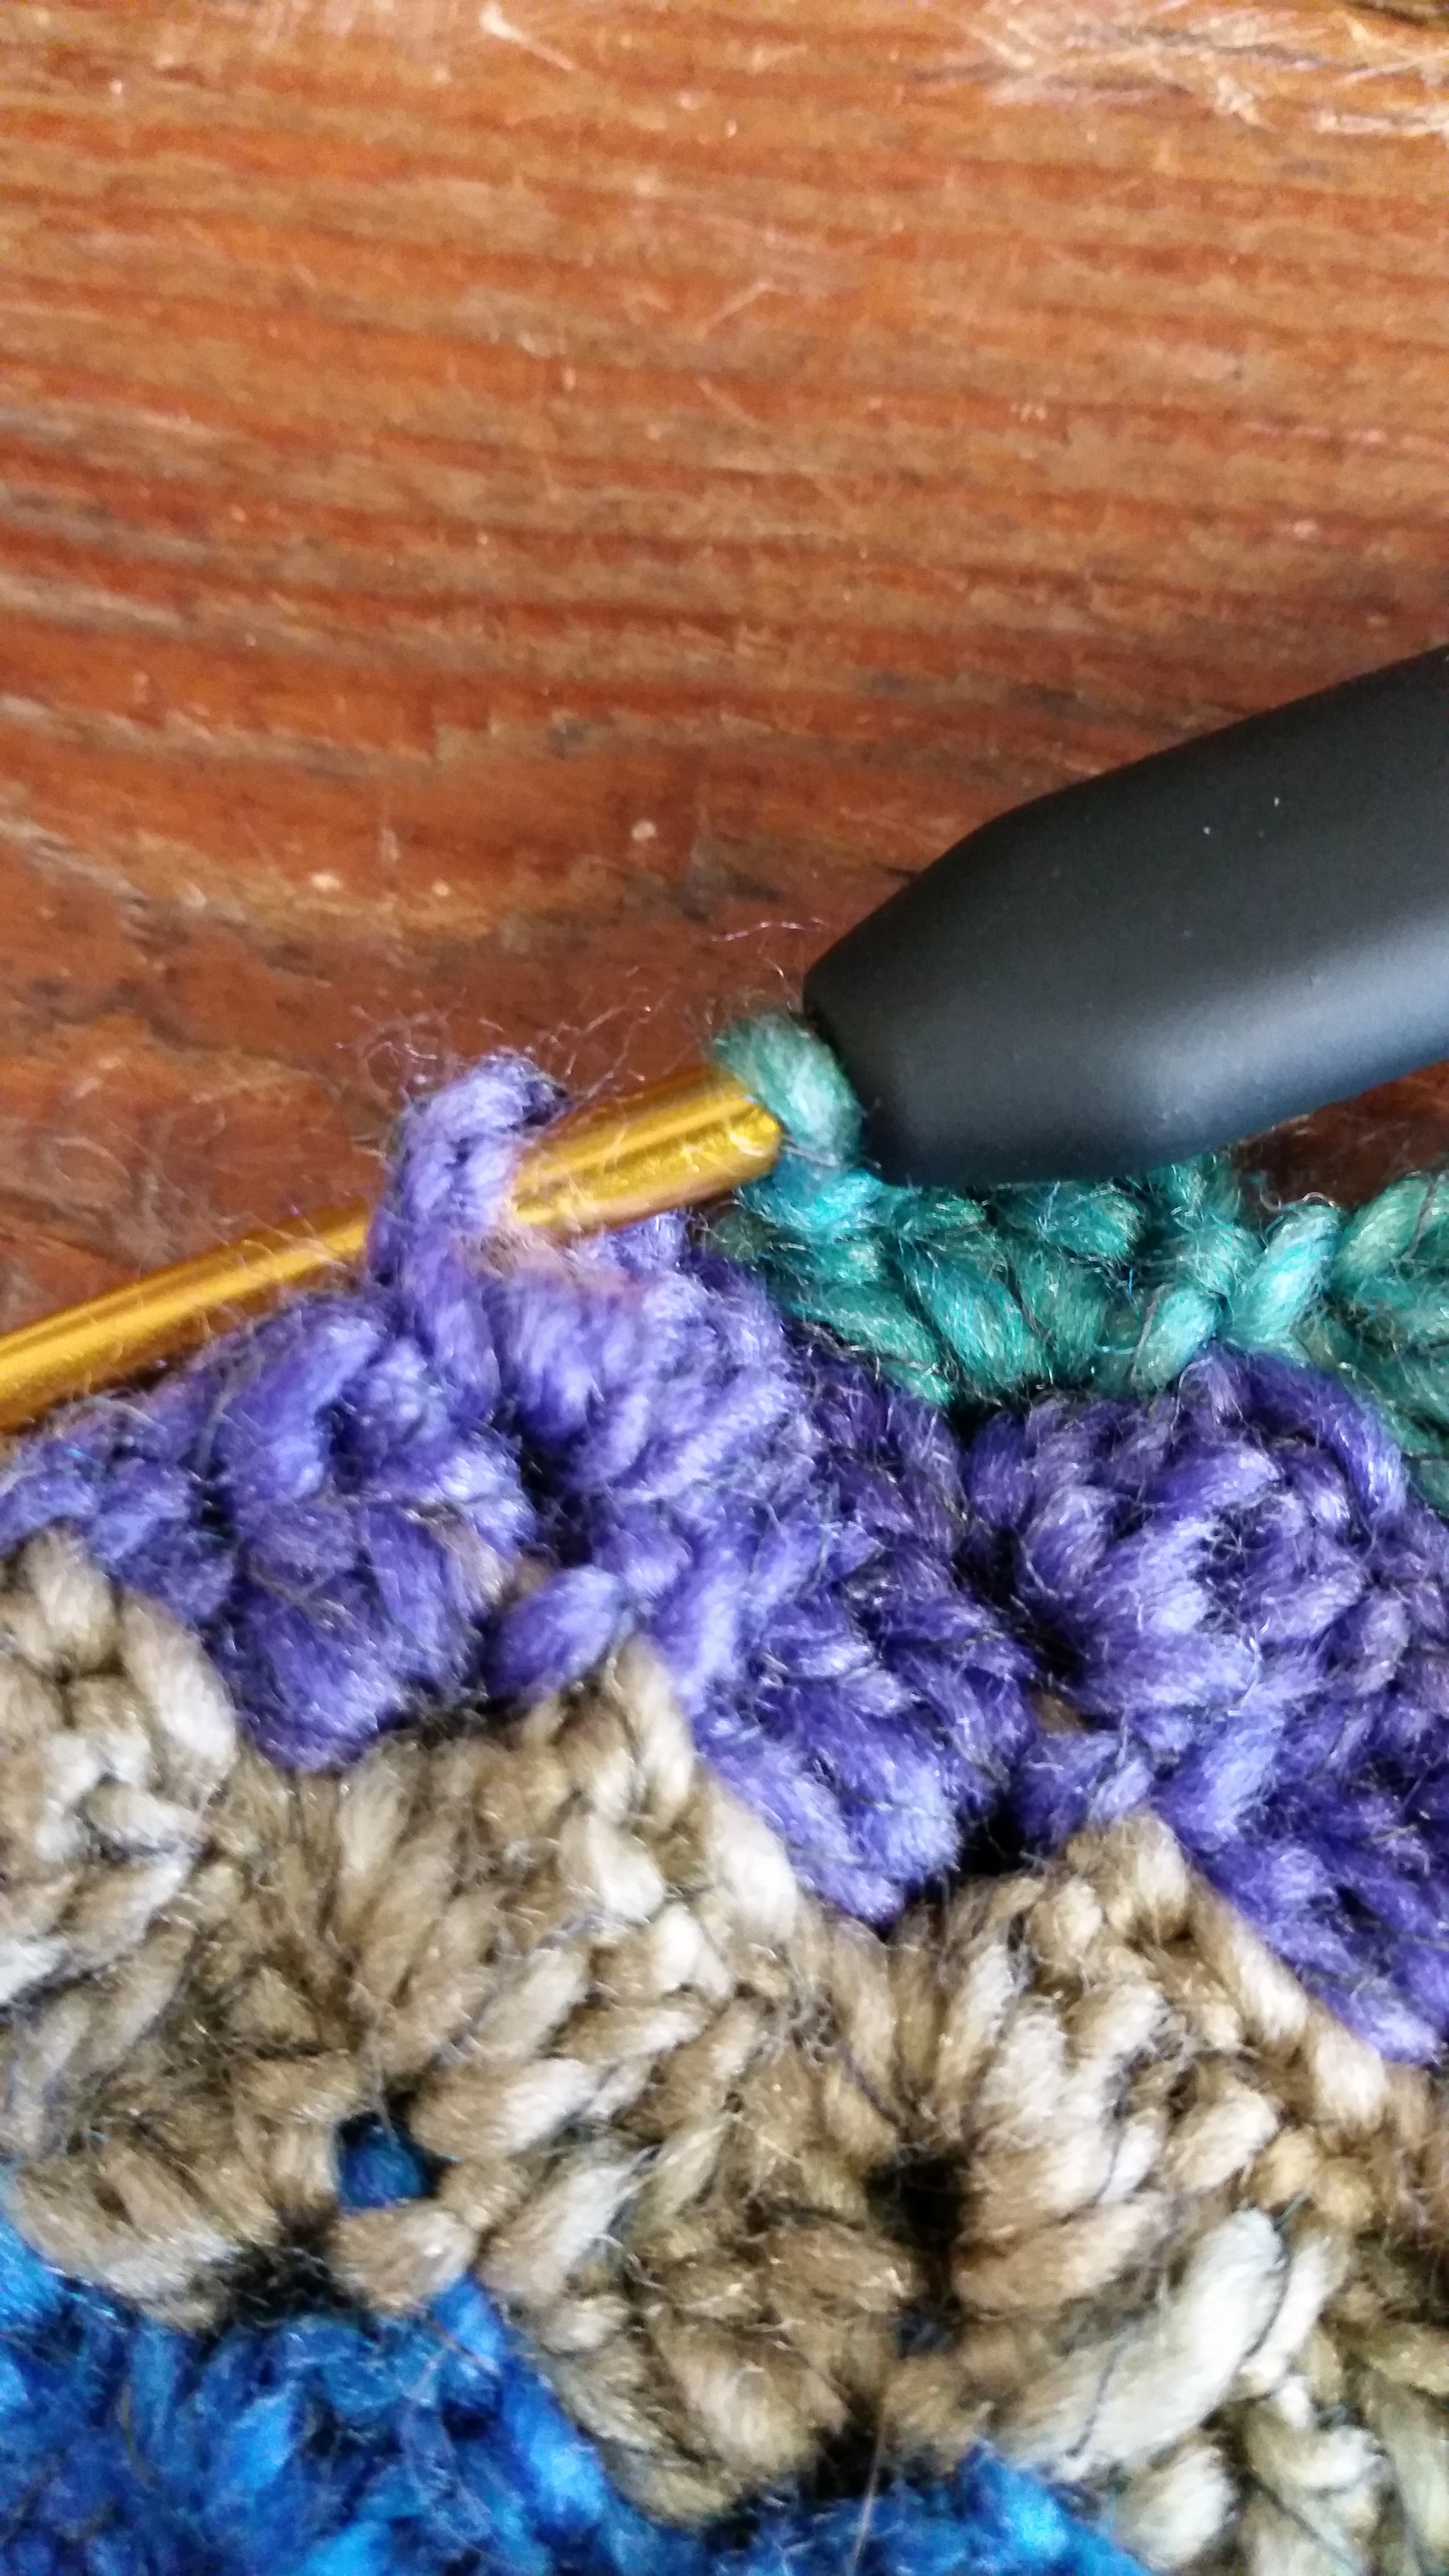
– 5. insert you hook into the next space, and slip stitch
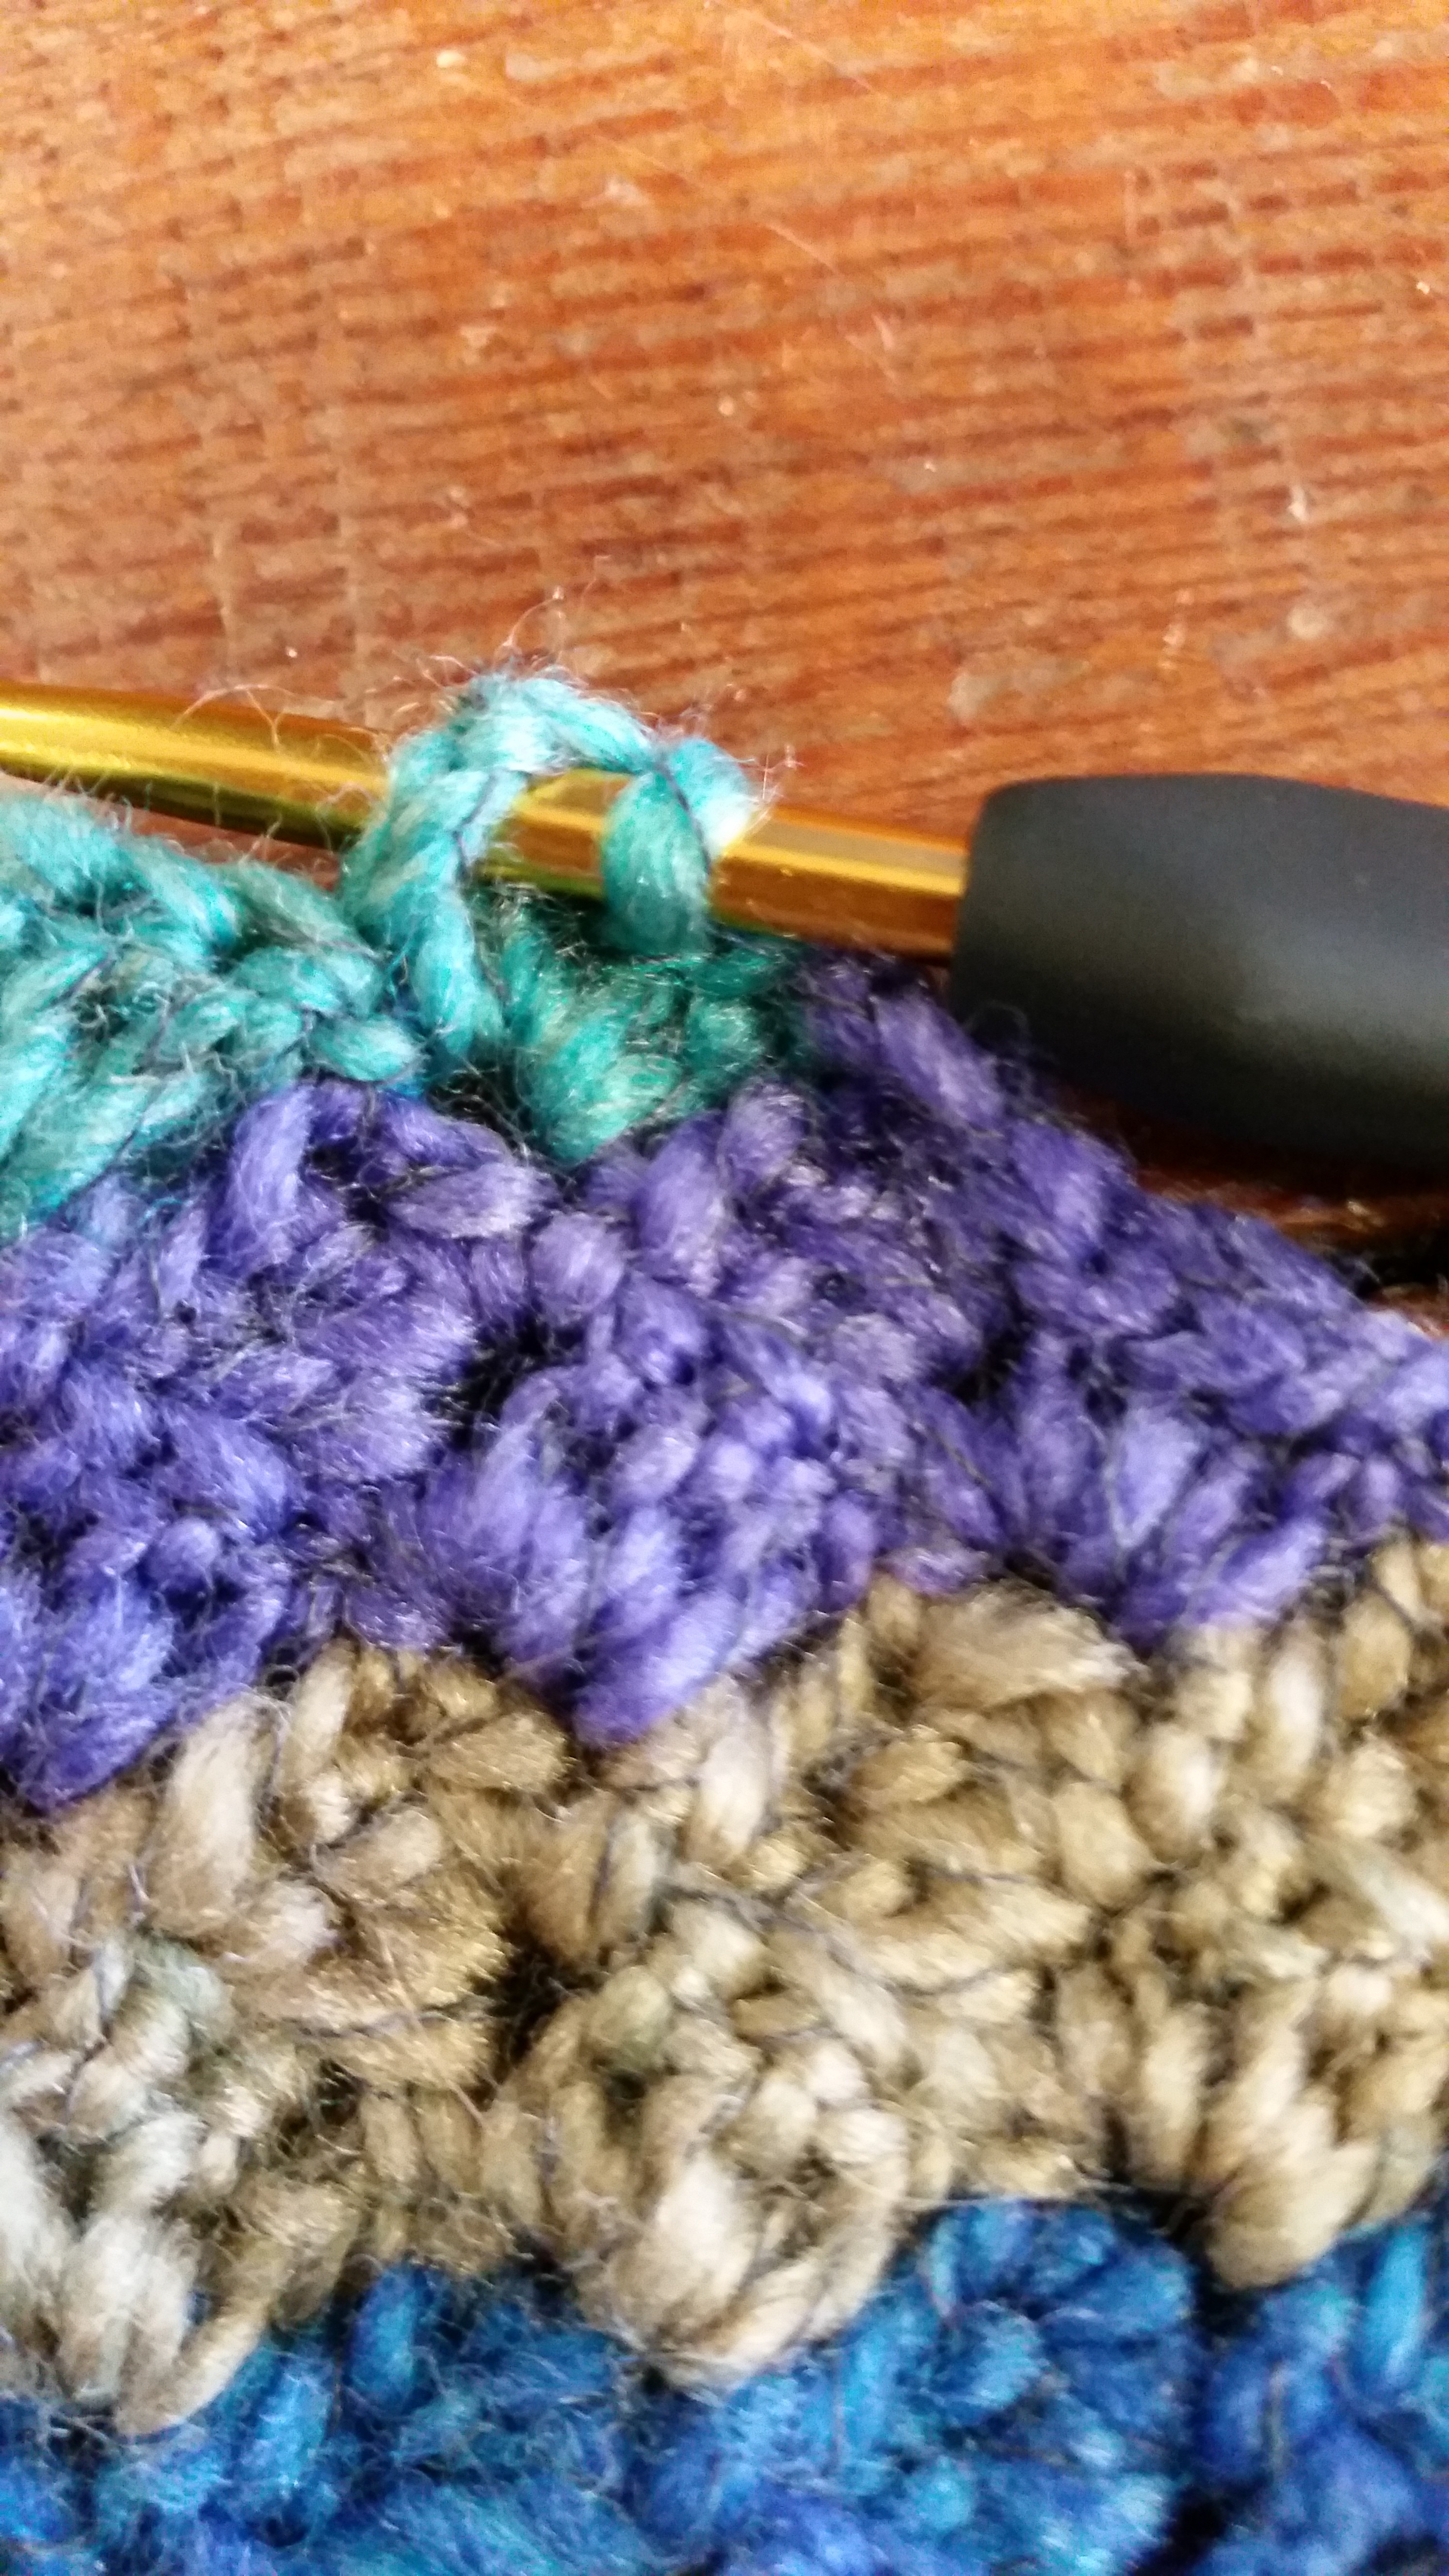
– 6. insert hook into last space and slip stitch
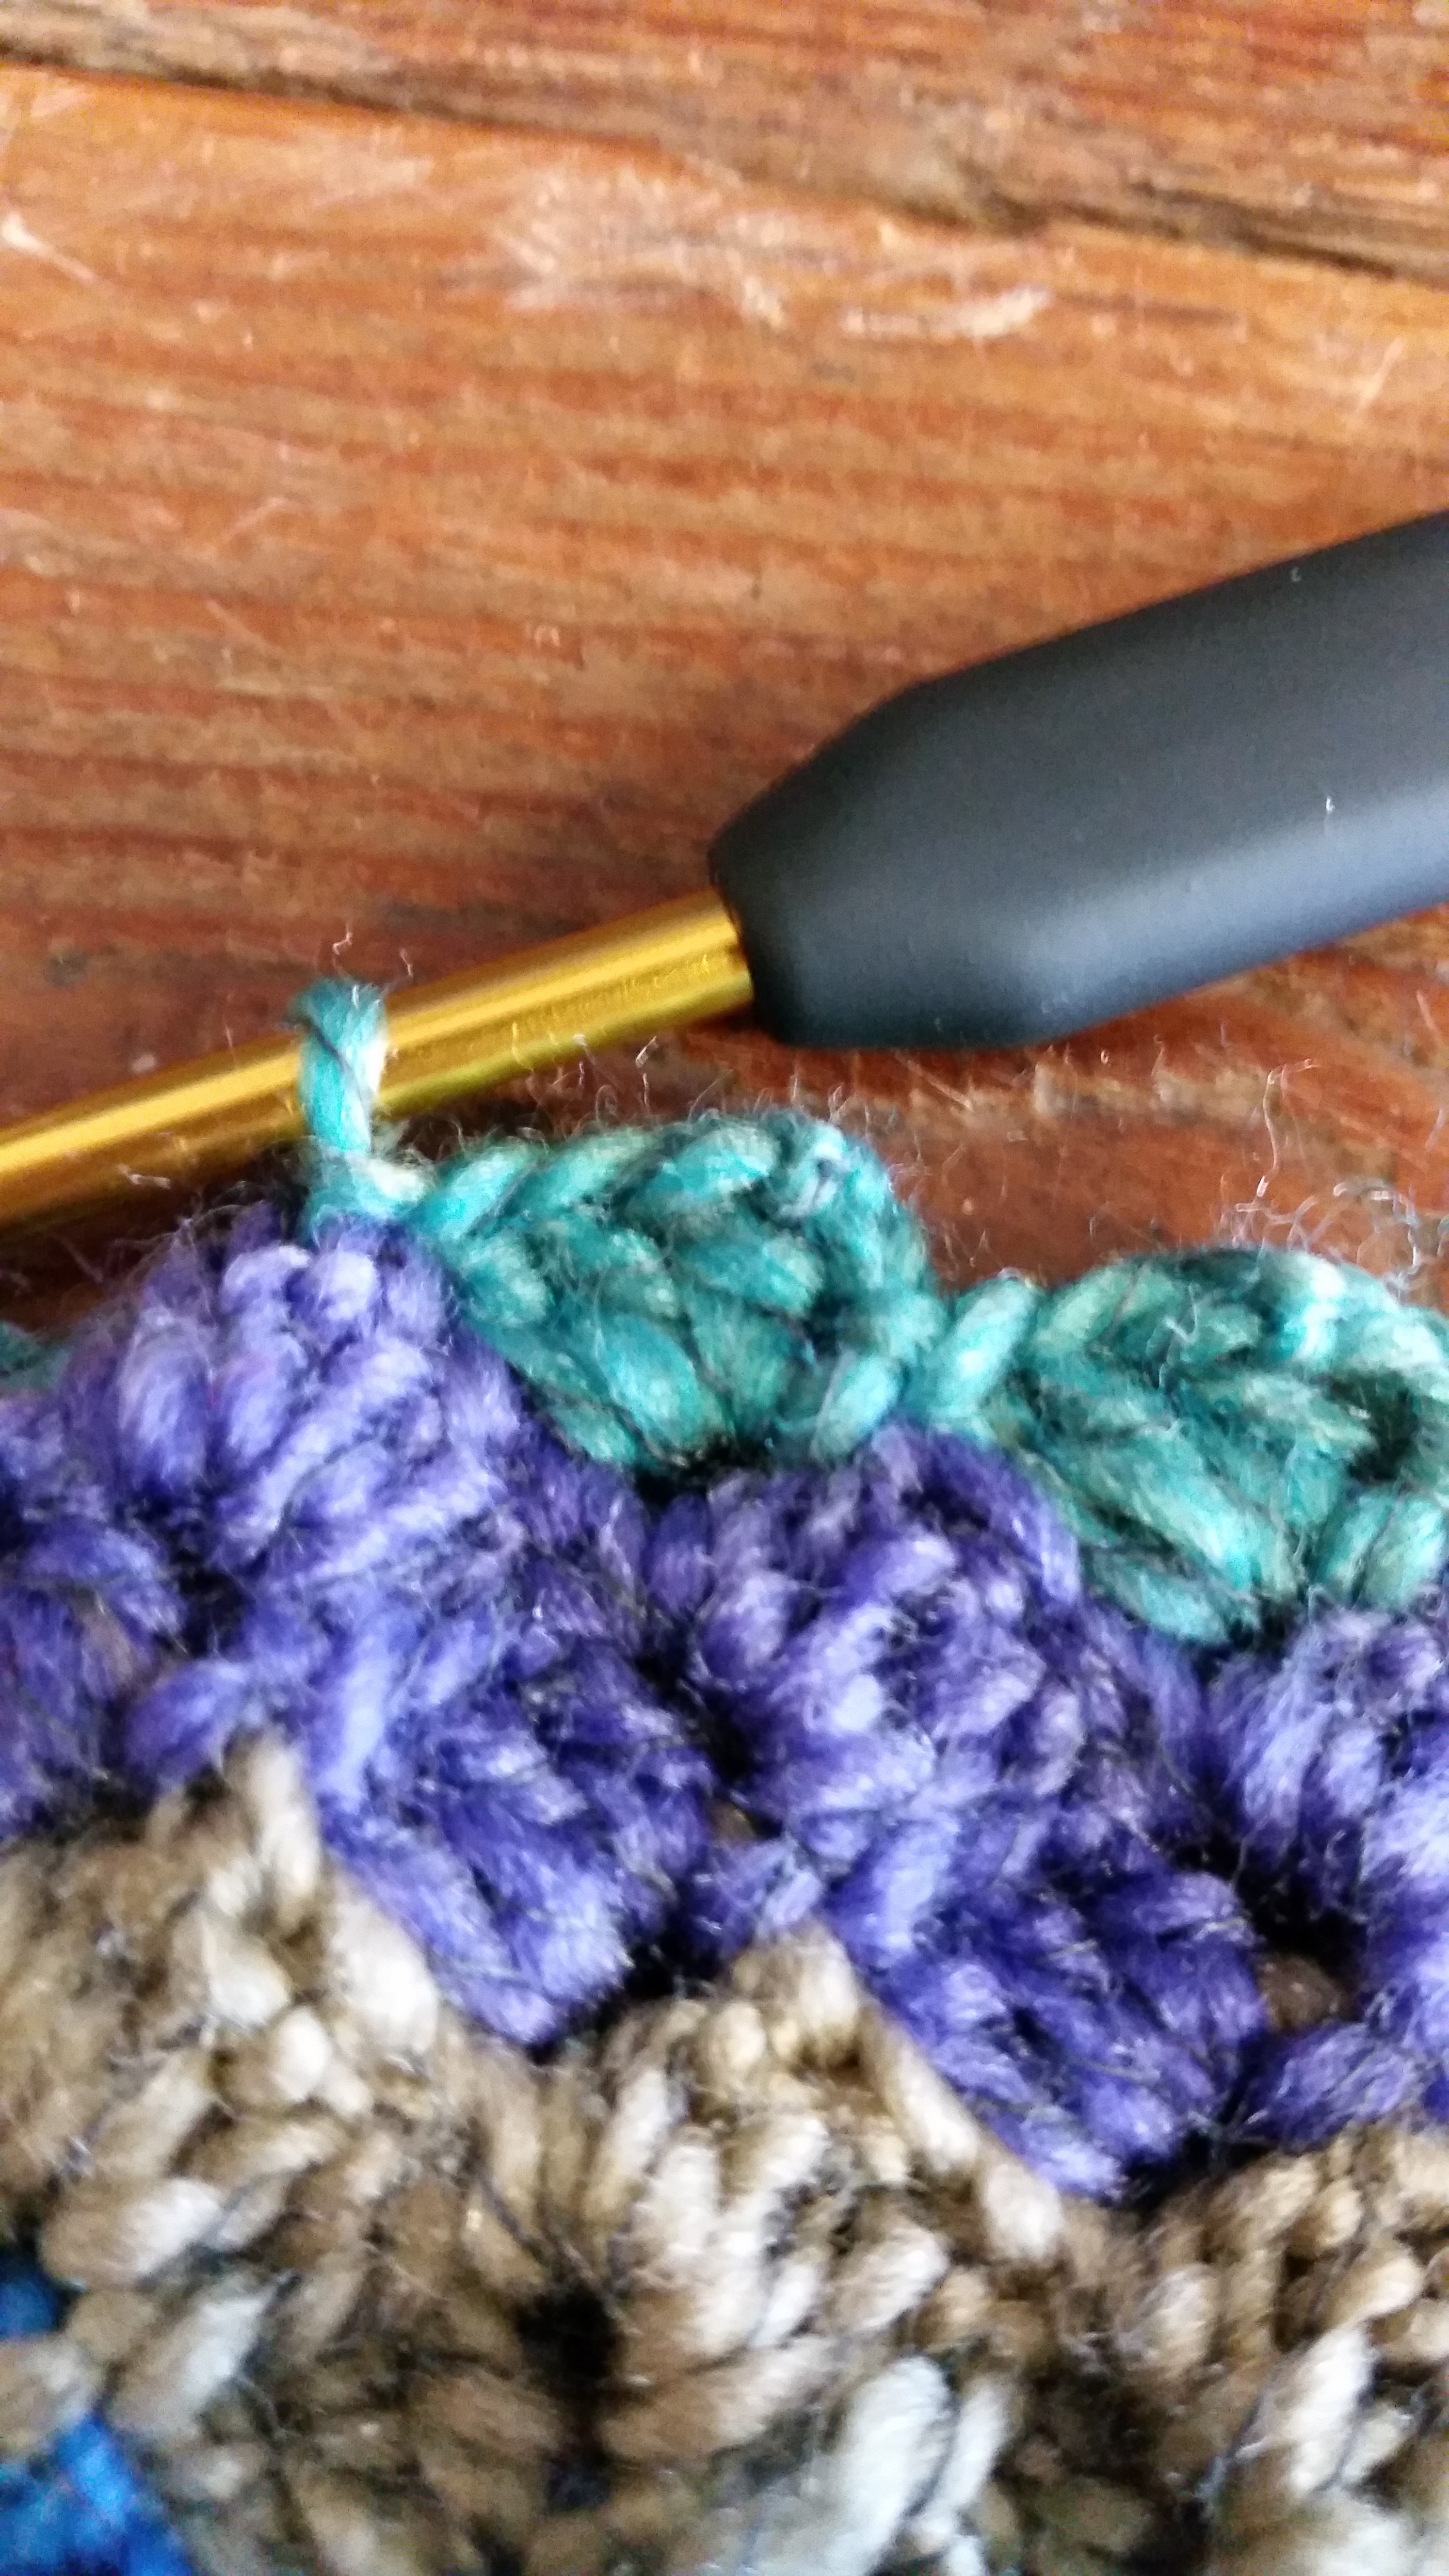
– 7. then work this space as normal, chain 3 and do 3 dc as normal in space
– 8. work way across row as normal
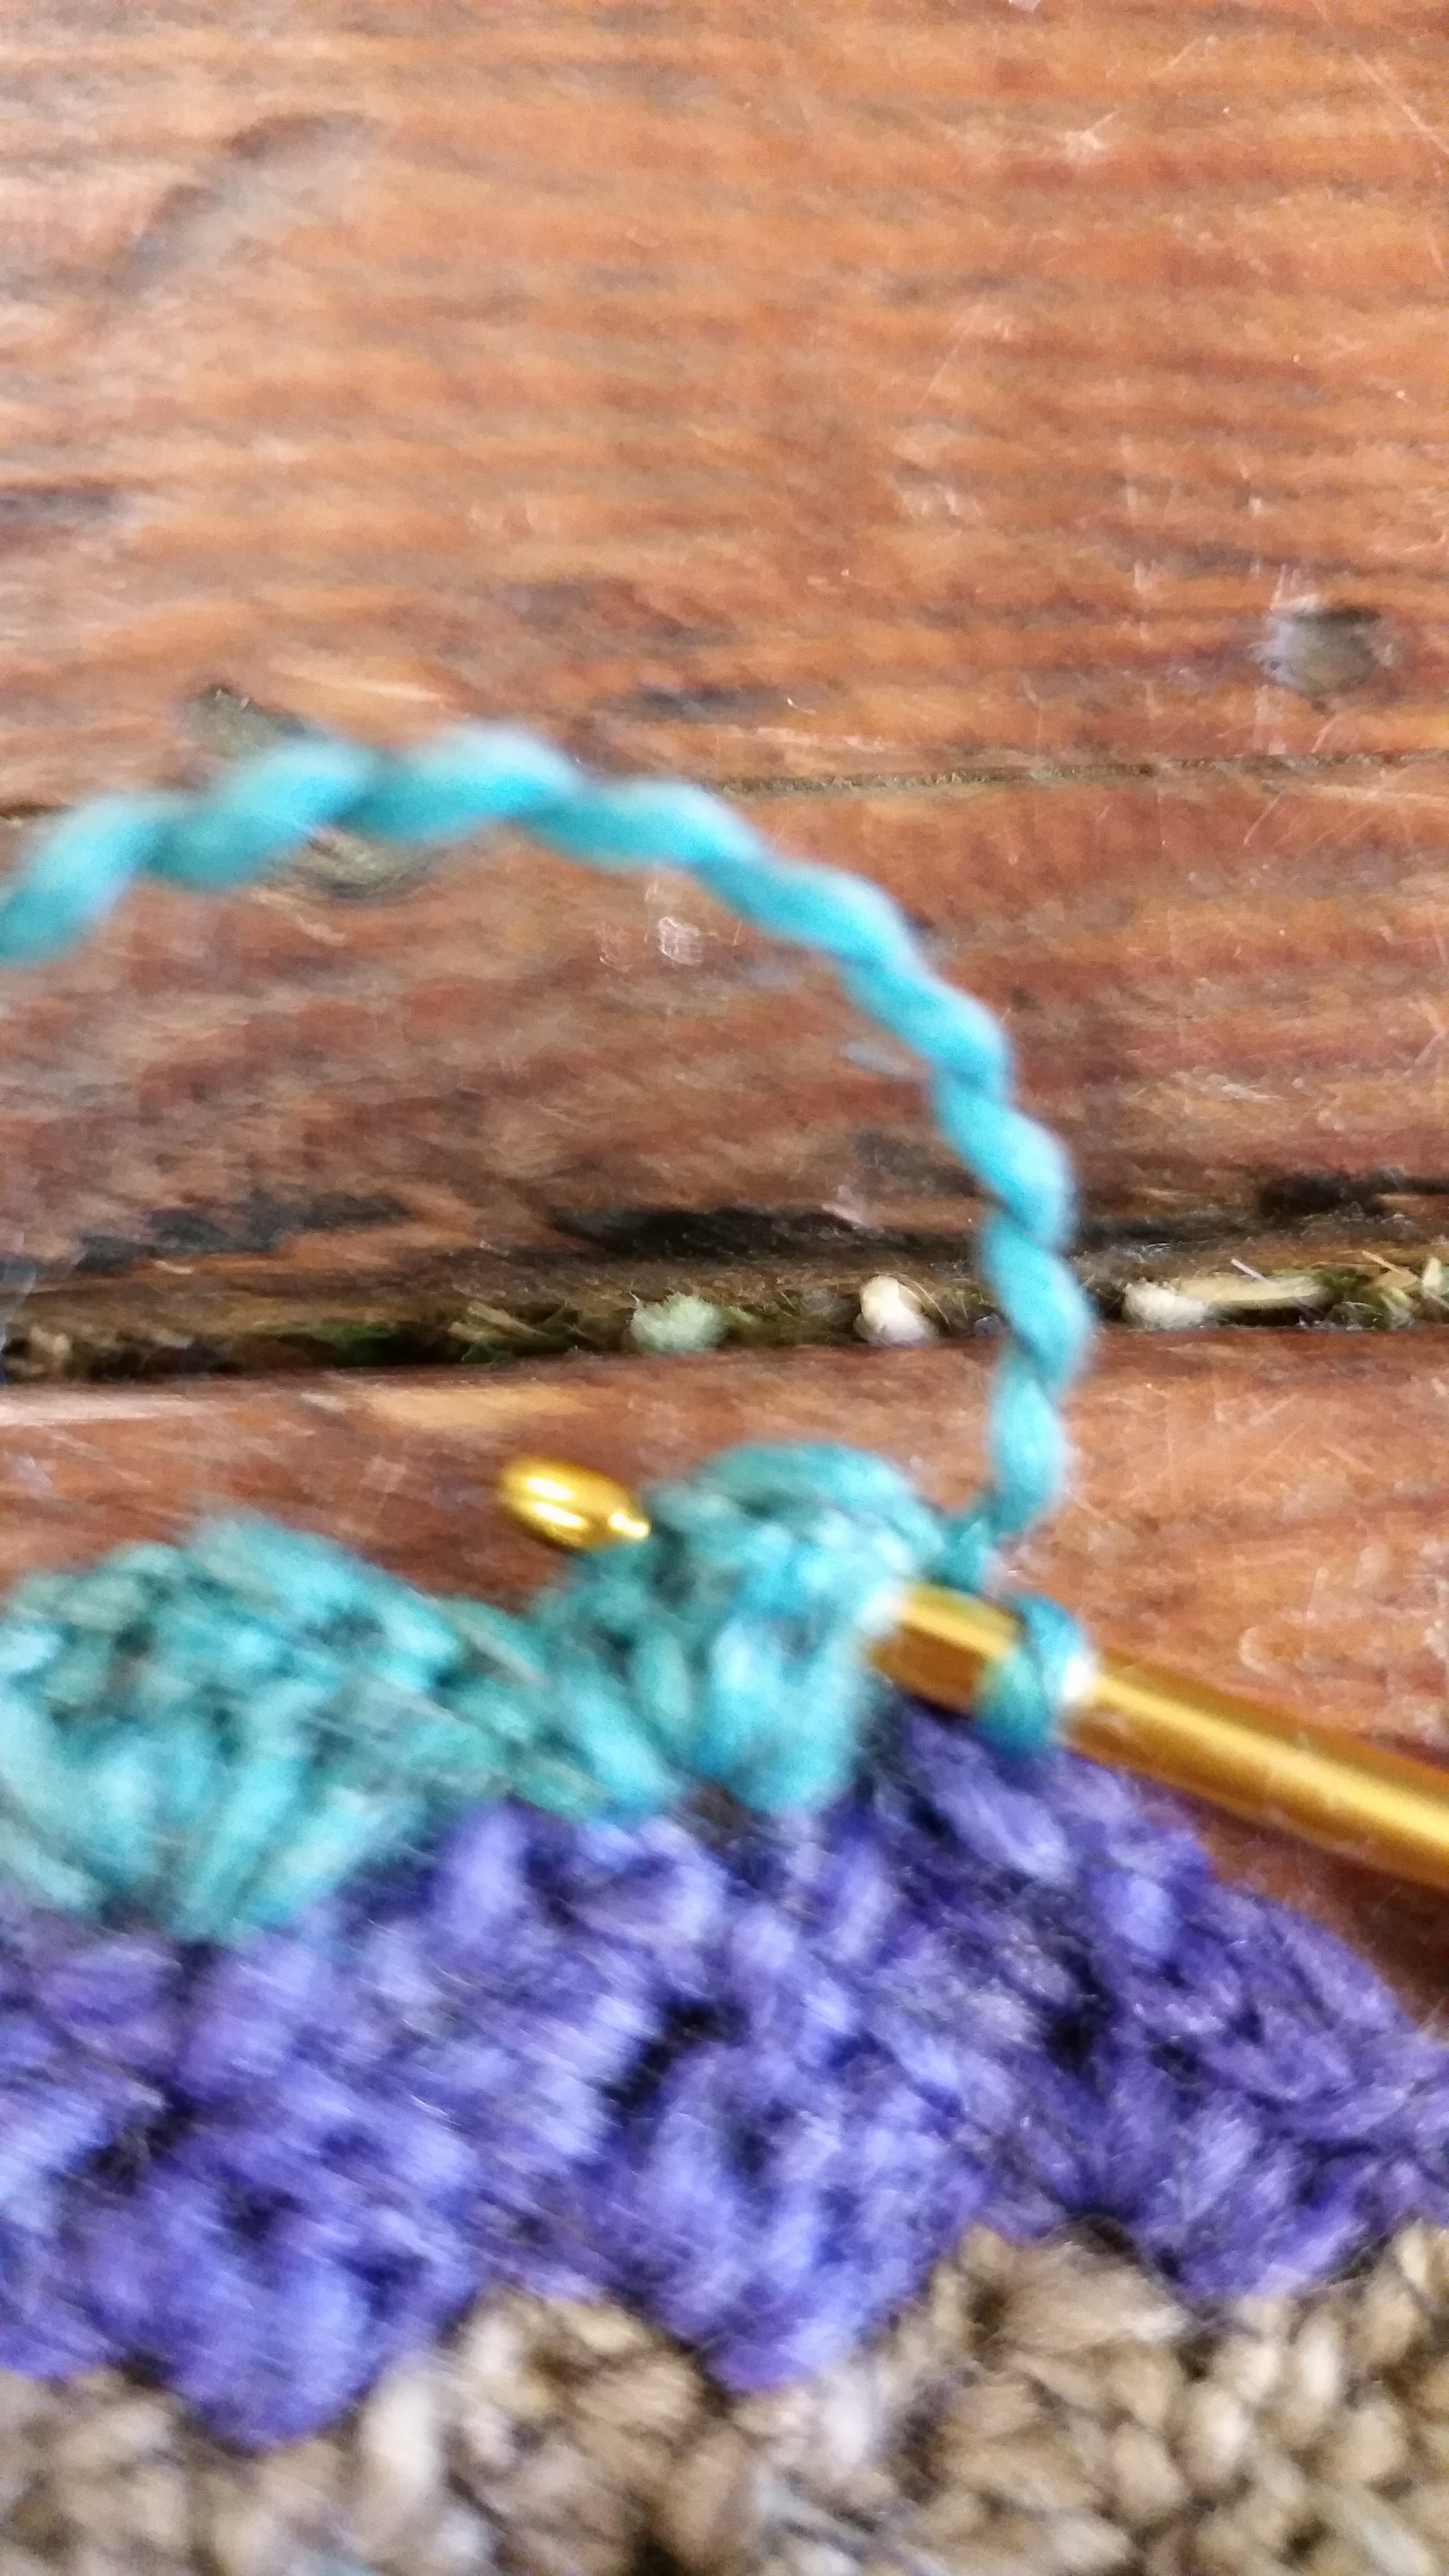
– 9. when you get to the last block in row below, repeat from point #3
– 10. when you get to the end of your square and only have one left to do, chain 3, do 3 dc’s, and insert hook into last space and slip stitch. cut of length of yarn and cast off. Thread a darning needle and weave in the yarn a good couple of inches.
And there you have your pattern, its a really easy pattern to and and grows very fast obviously the wider you get the longer it takes but when you get to the decreasing stage again to gets fast again. Its one of those patterns that once you have got the hang of it you can carry on without thinking about it. I found that one of my sides was slightly mis-shaped by im putting it down to tension. A wee bit of blocking and its perfect. I have a bit of a ball left and would be a shame now to use it so I am planning on adding on a border to finish it off. All in all I will have used 3 balls and I used colour 04. I have uploaded all the colours on our online shop for you to have a wee browse.
I would absolutely love to see how you get on. Show me your pictures on our facebook page Elizabeth Rose NI


Comments are closed.